Lego Throne
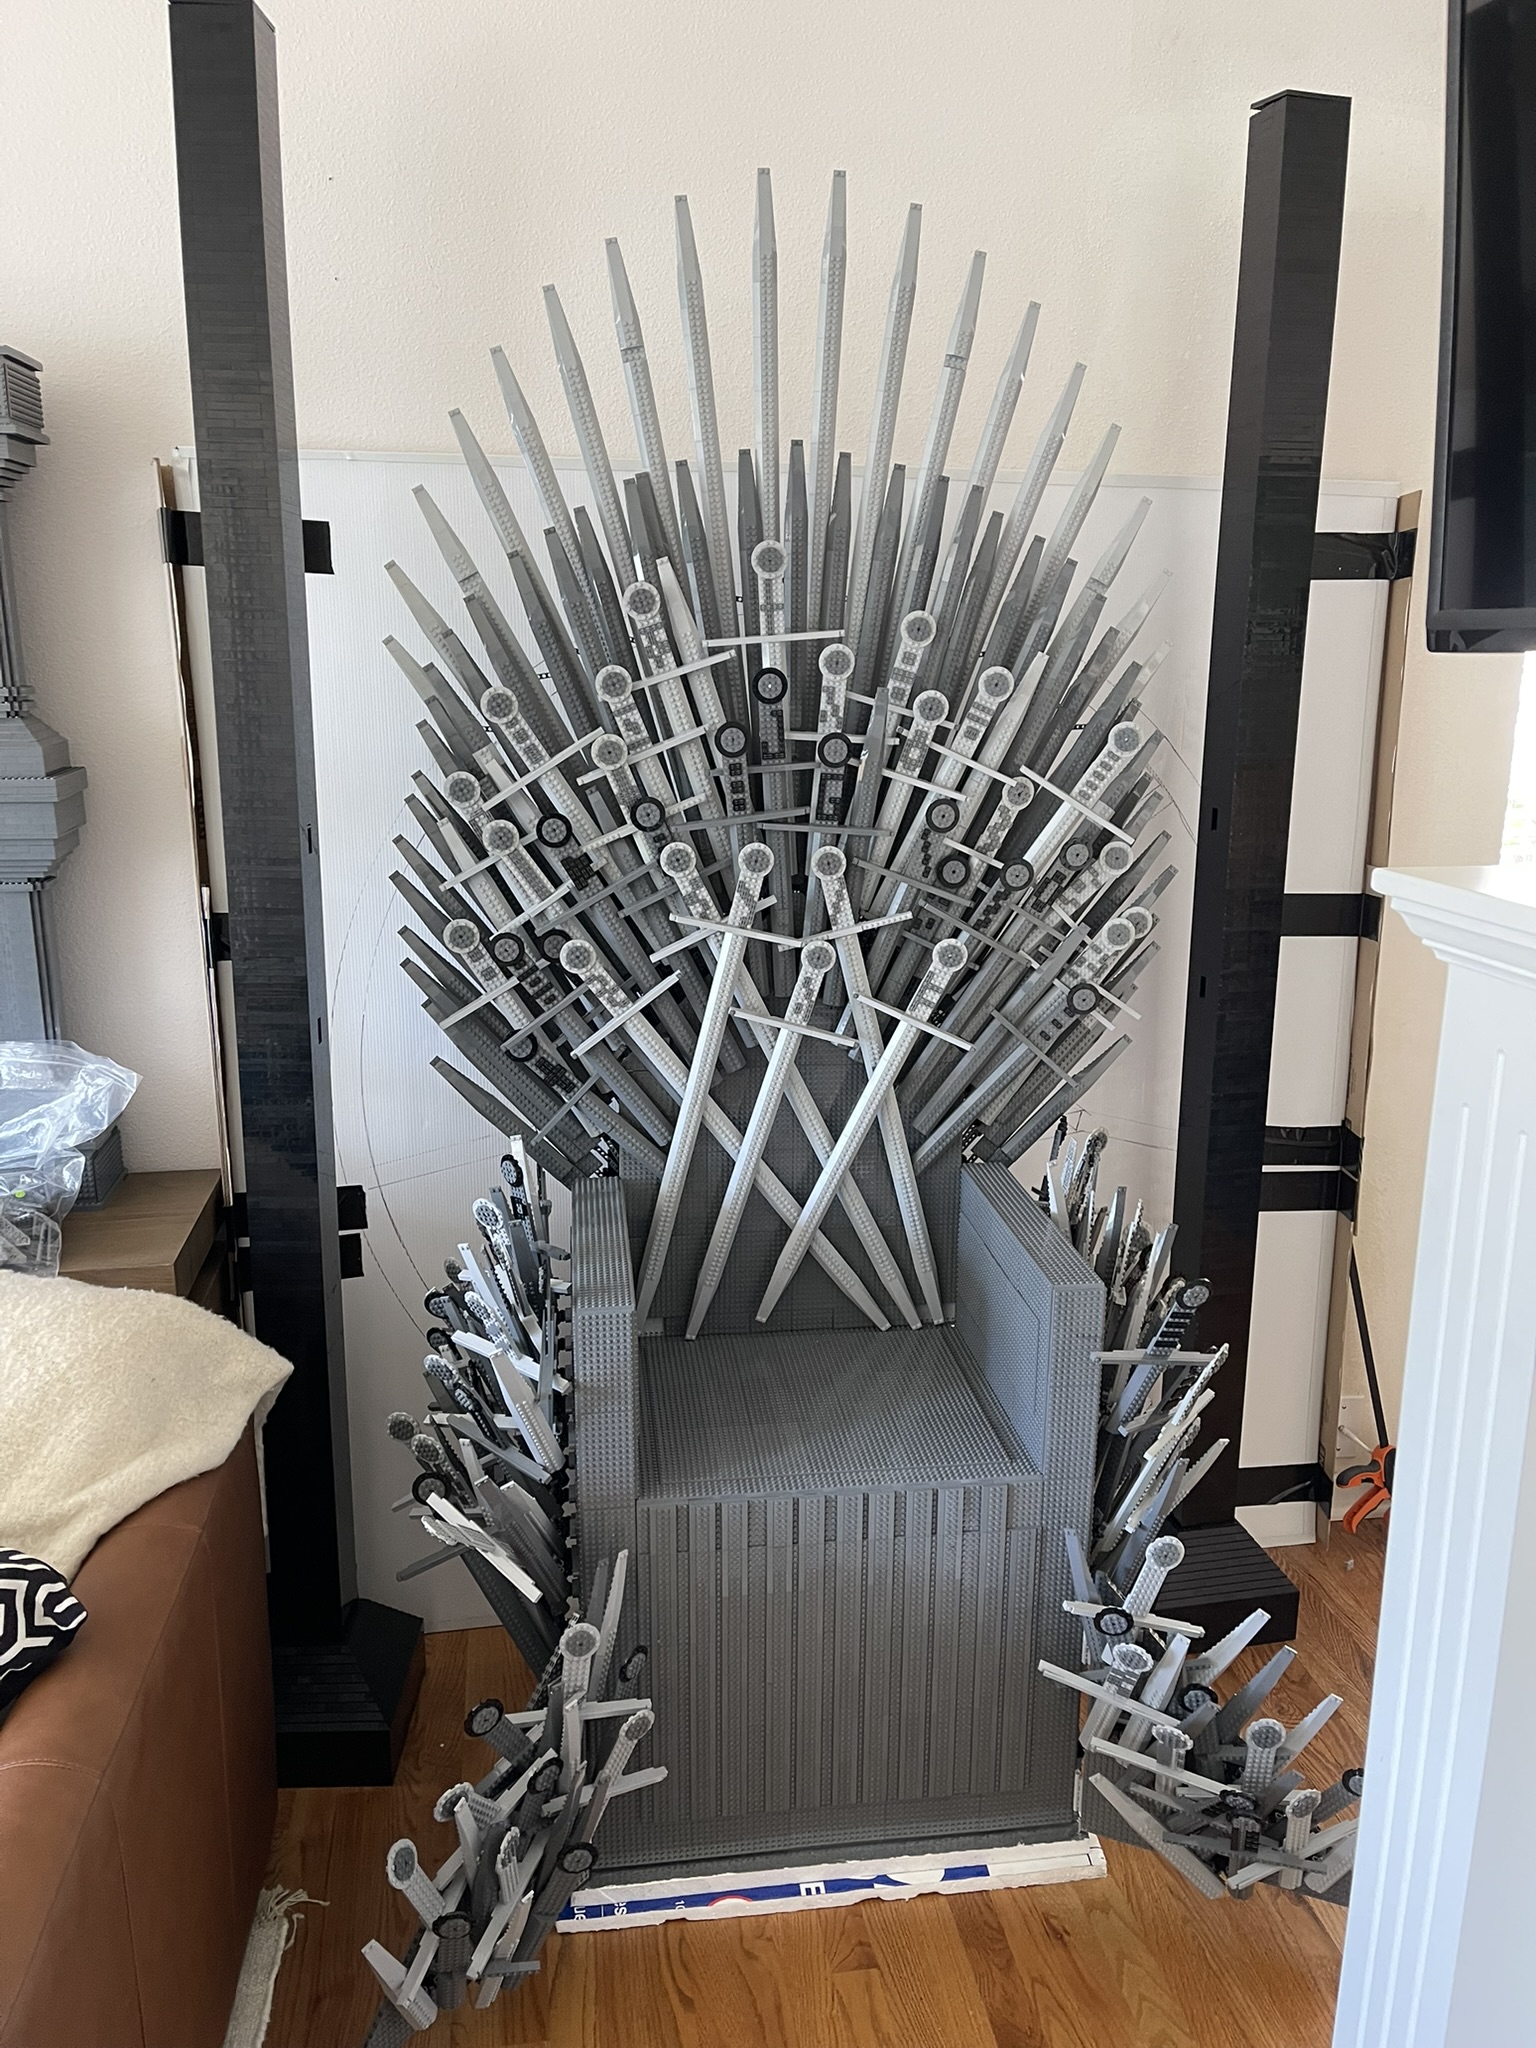
The Lego Throne is my own creation (MOC) life-sized LEGO rendition of the Iron Throne as seen in HBO’s Game of Thrones television series.
The seat of the throne is 5 wide, 4 high, 4 deep when measured in 16x16 plates with arms reaching 2 plates above the seat and the solid back 3 plates higher than the arms. The top of the rear fan blade extends another 7 high when measured by such plates for a total height approaching 7 feet tall.
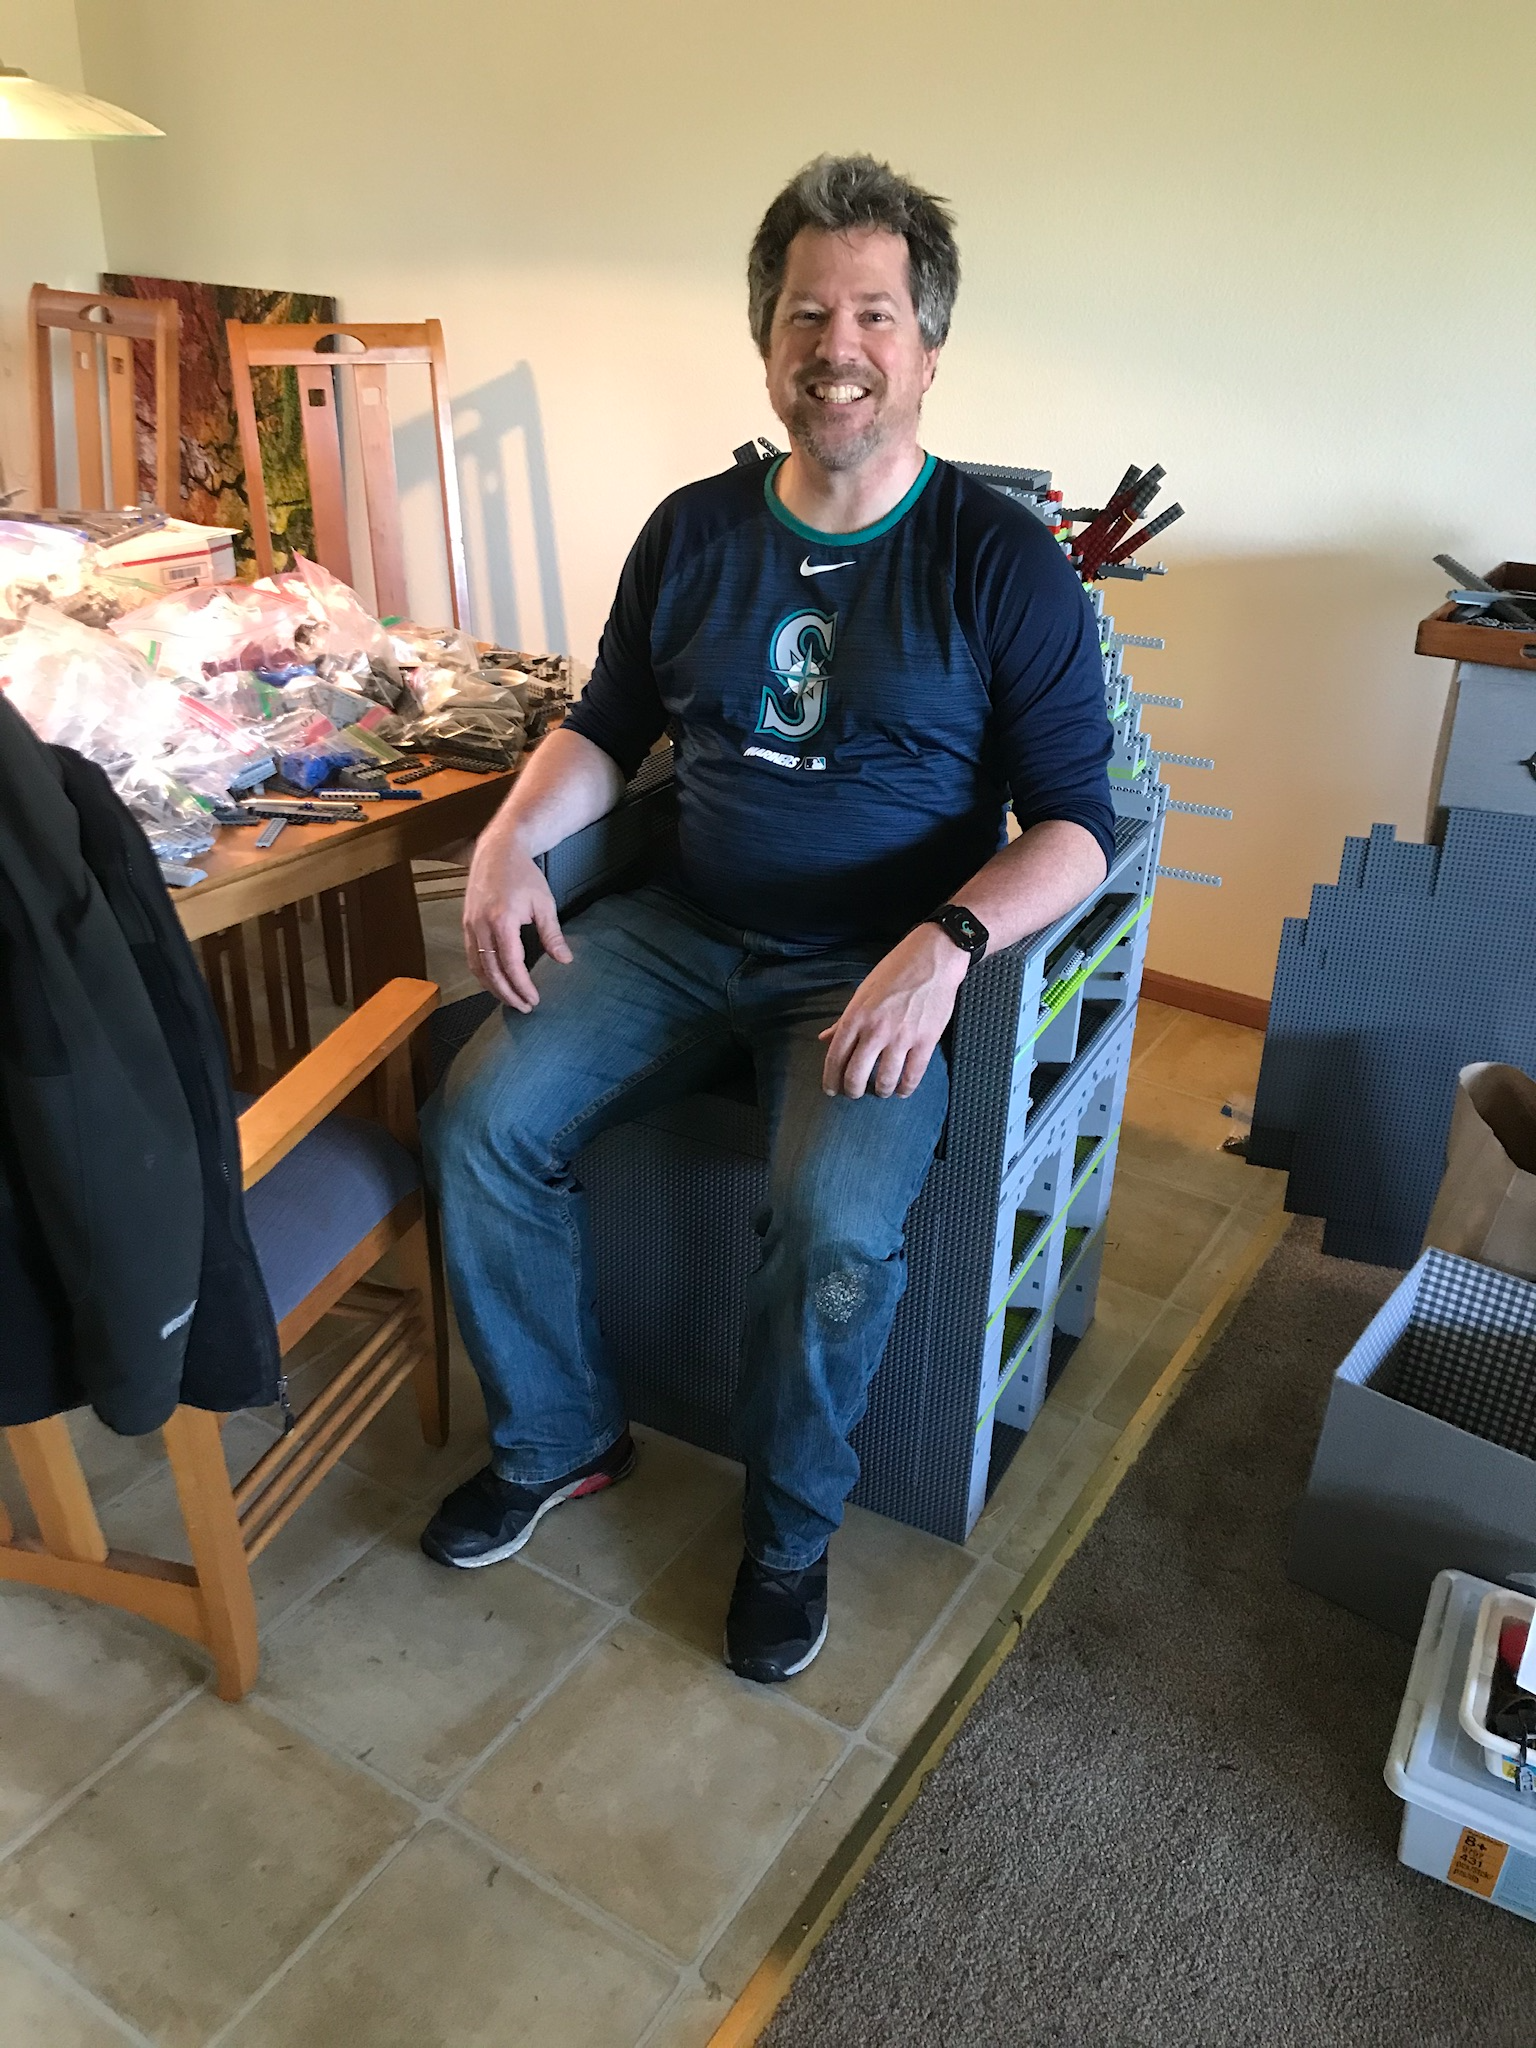
The Lego Throne is strong enough to sit on and I collect photos of friends and family doing so.
History
I began the Lego Throne in 2020 as my first significant Lego creation.
Version 1
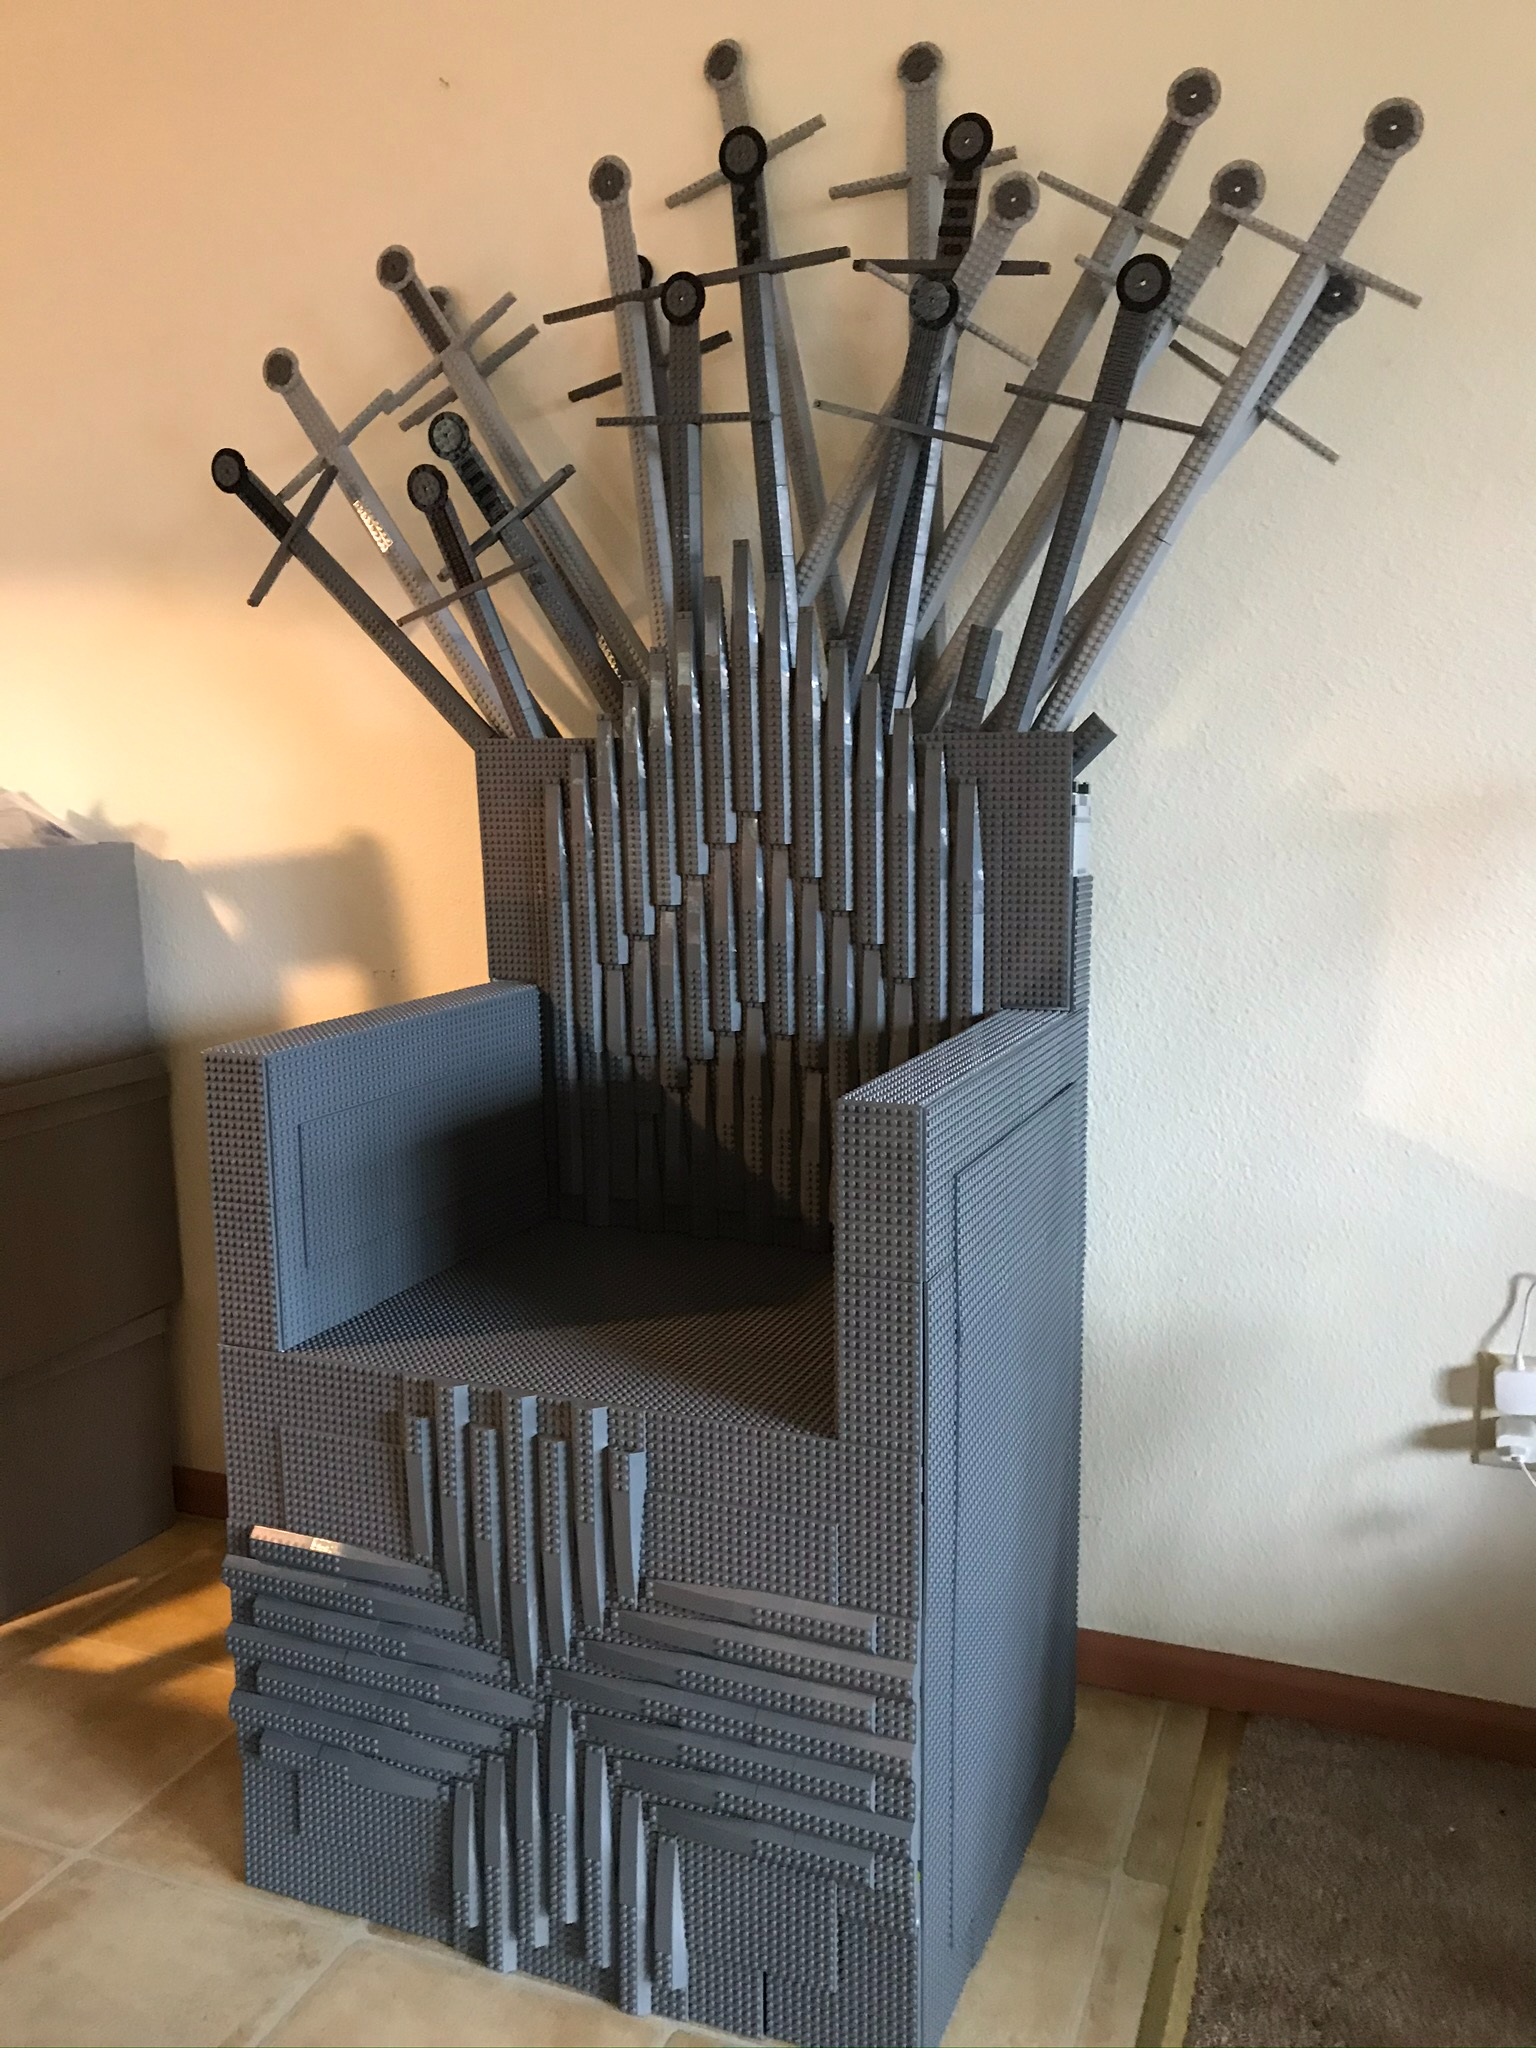
What I call the first version of the throne was a chair and a bucket of swords. What worked well in that design:
- Seat design - The seat dimensions, pillar construction, and outer plating were strong enough to hold me and persists in the current build.
- Blade design - The blade design with 2x8 Slope 45 also remains unchanged.
- Bricklink - This build forced me to find and leverage BrickLink.com to supply bricks at volume.
What didn’t work well:
- Blade fan - This came nowhere close to the aesthetic of the Iron Throne and was the main focus of v2.
- Surface blades - The blades mounted directly to the plates were too straight for the random angle aesthetic.
- Seat back - The short, squared out seat back would prove to be insufficient for future blade mounts.
Version 2
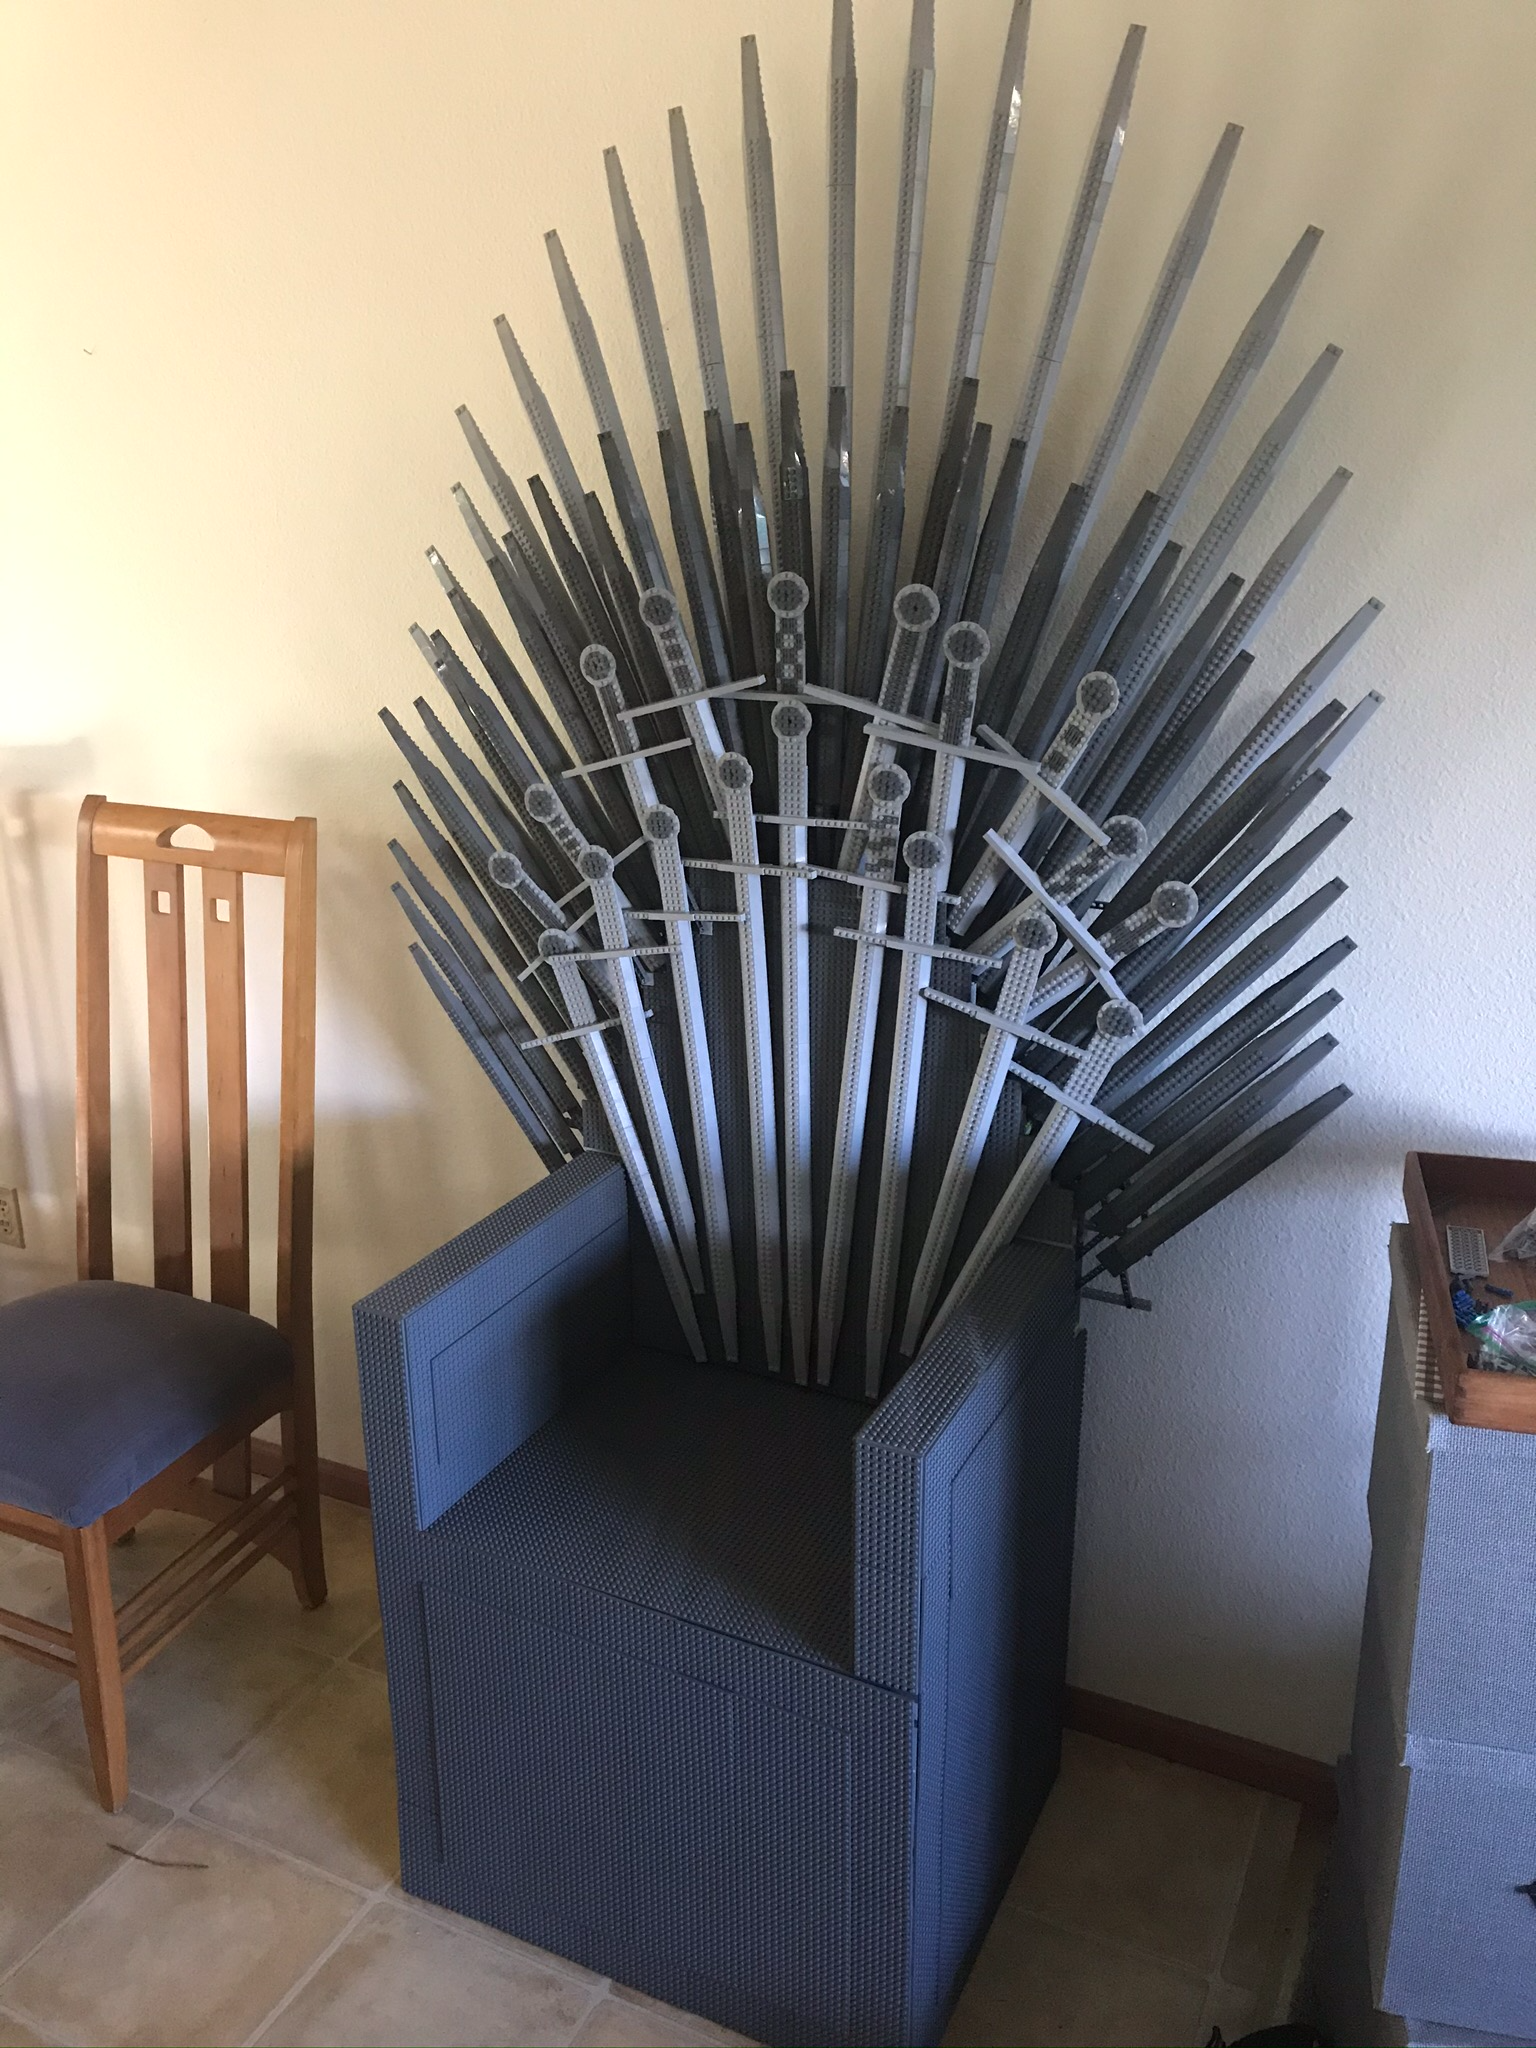
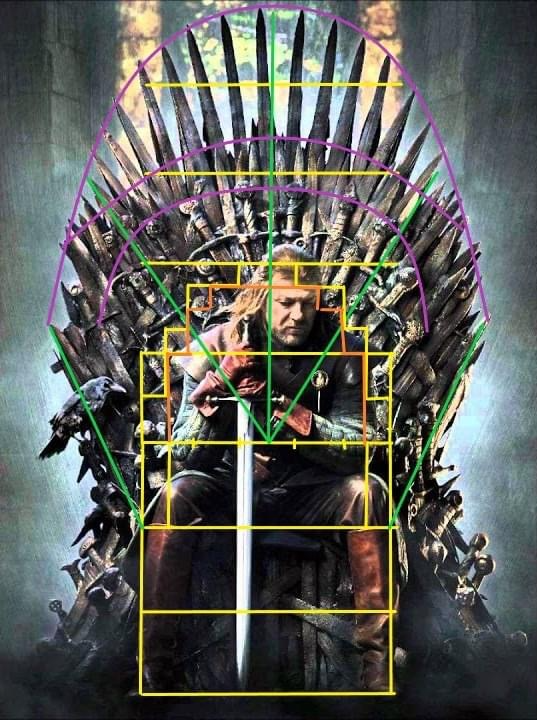
Upon completion of v1, I immediately began a major upgrade to match the aesthetic of the Iron Throne. This began with finding a reference image and measuring the height and curve of the rear two blade fans. What worked well in that design:
- Layered fans - The two precide top-up blade fans in the rear with more chaotic hilt-up front blades matches the throne aesthetic pretty well.
- Alternating colors - I chose to alternate layers between Light Bluish Gray and Dark Bluish Gray, rather than mix colors or add additional colors. This unifies each layer and contrasts with neighboring layers.
- Tapered seatback - I rebuilt the seatback to be taller and tapered to support a mounting curve.
What didn’t work well:
- Bare seat - I focused entirely on the rear blade fan and layering with no consideration for the sides or seat.
- Triangle mounts - Both rear fans were mounted using bespoke “triangle” mounts with the blade anchored via a technic liftarm pinned to top of the the seatback with another liftarm securing its angle.
- Portability - This design was difficult move, requiring about four hours for disassembly and another four for reassembly.
Gallery of Nobles
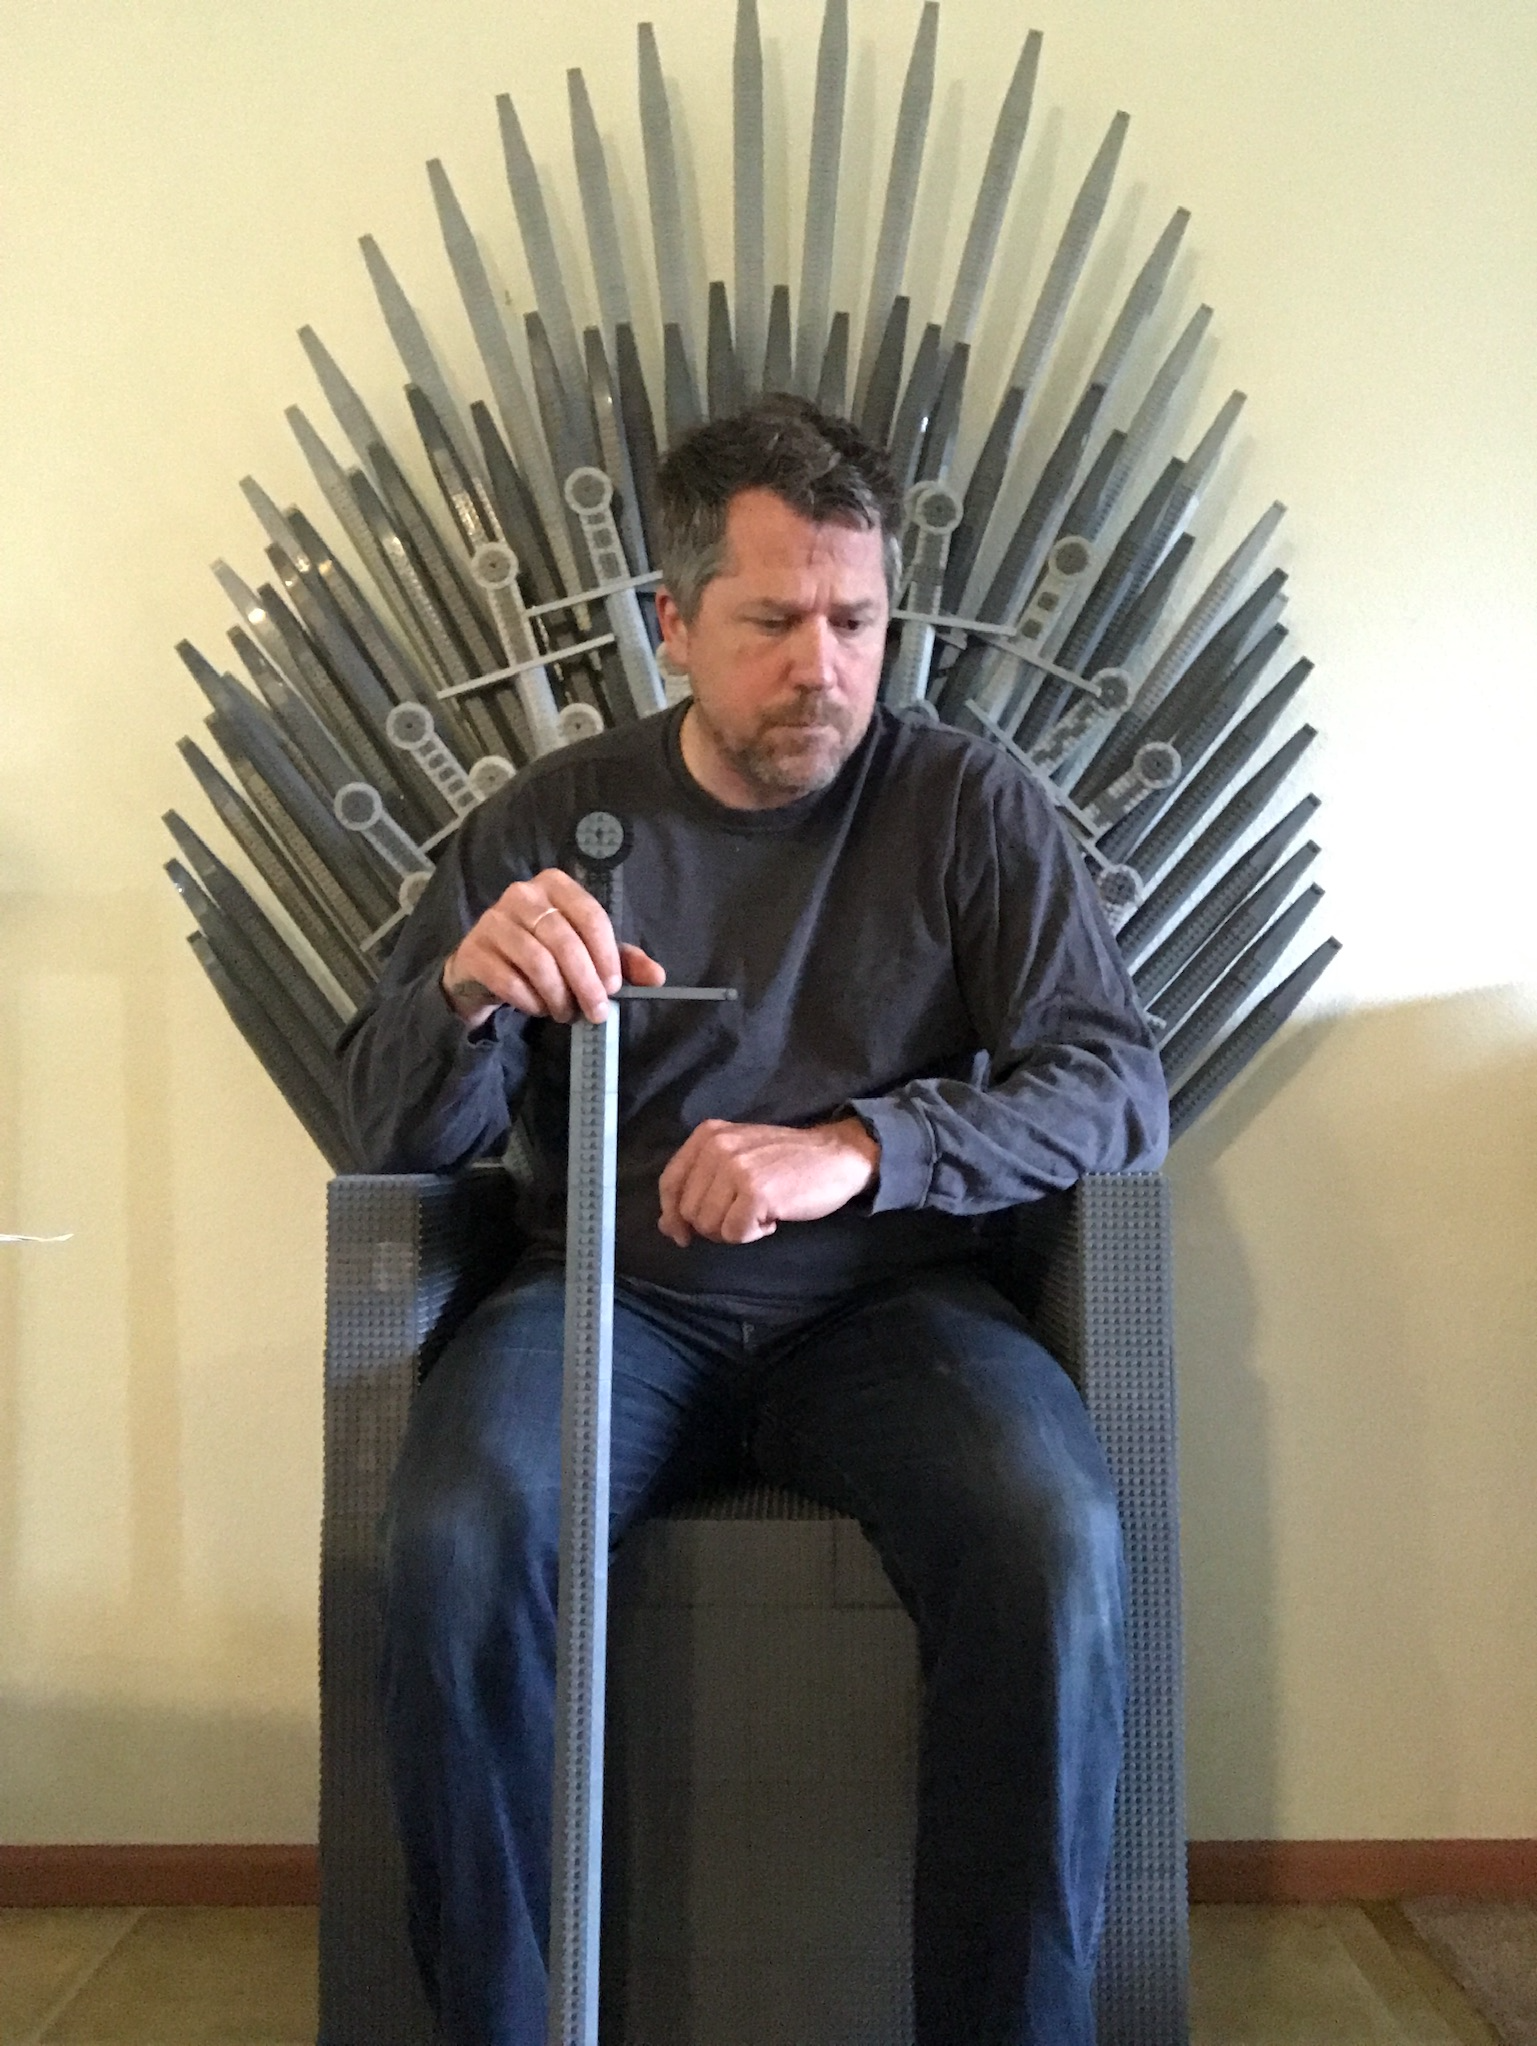

I took my first photo of a friend on the throne during his visit in November 2021 and have been collecting photos of friends and family on the throne ever since.
BrickCon 2024
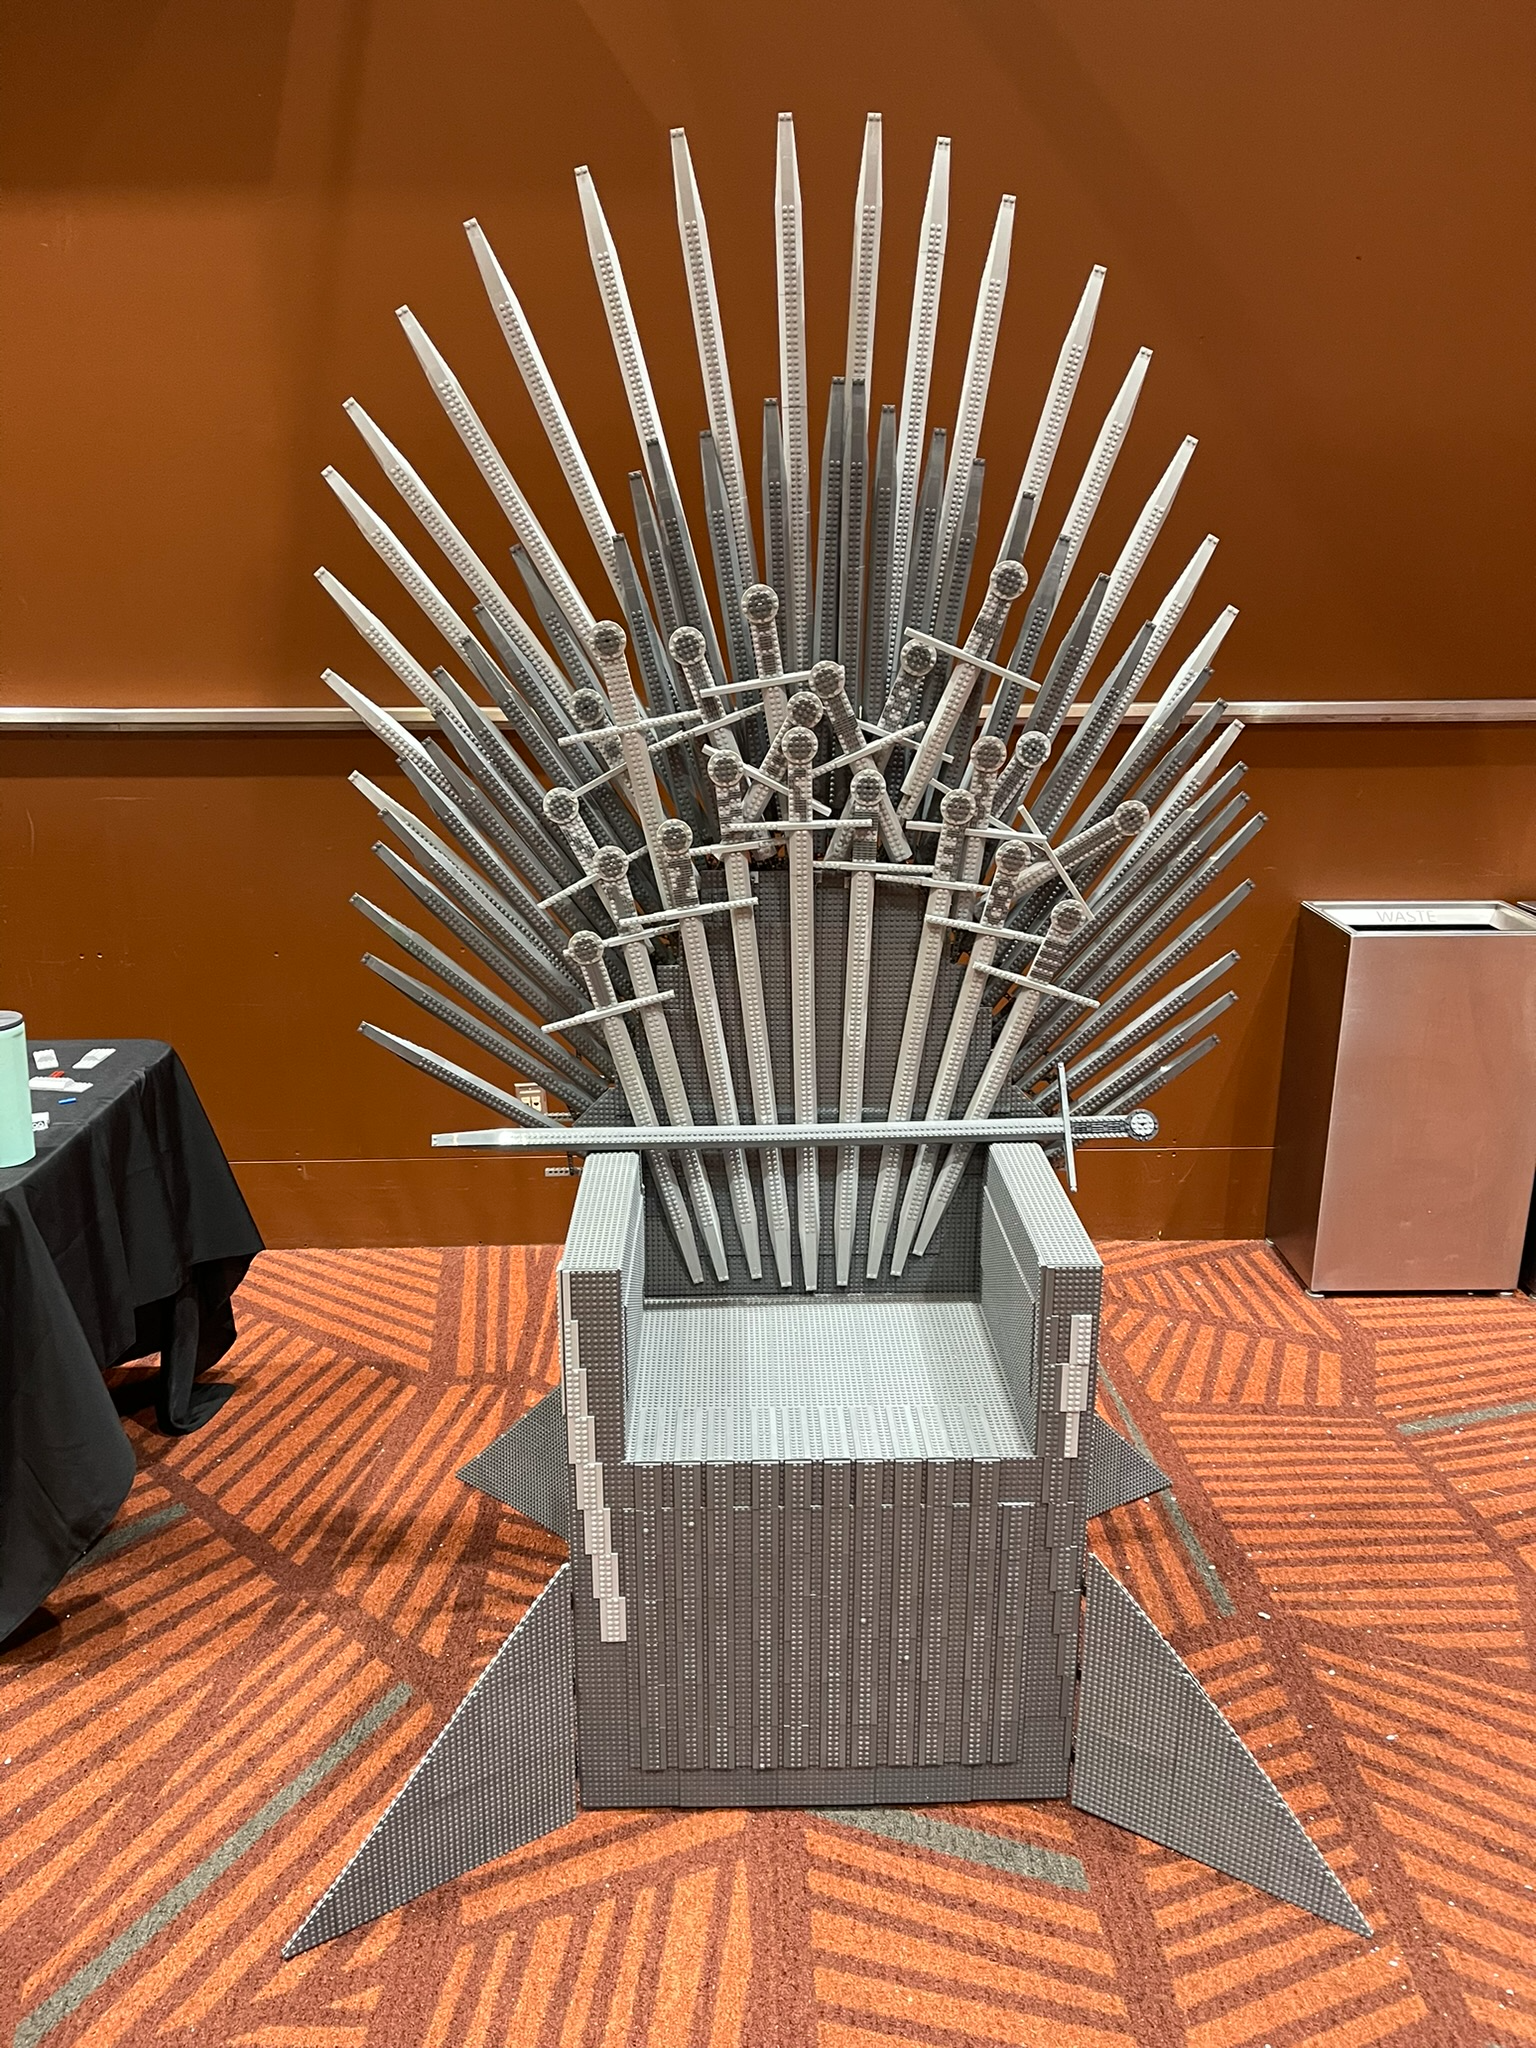
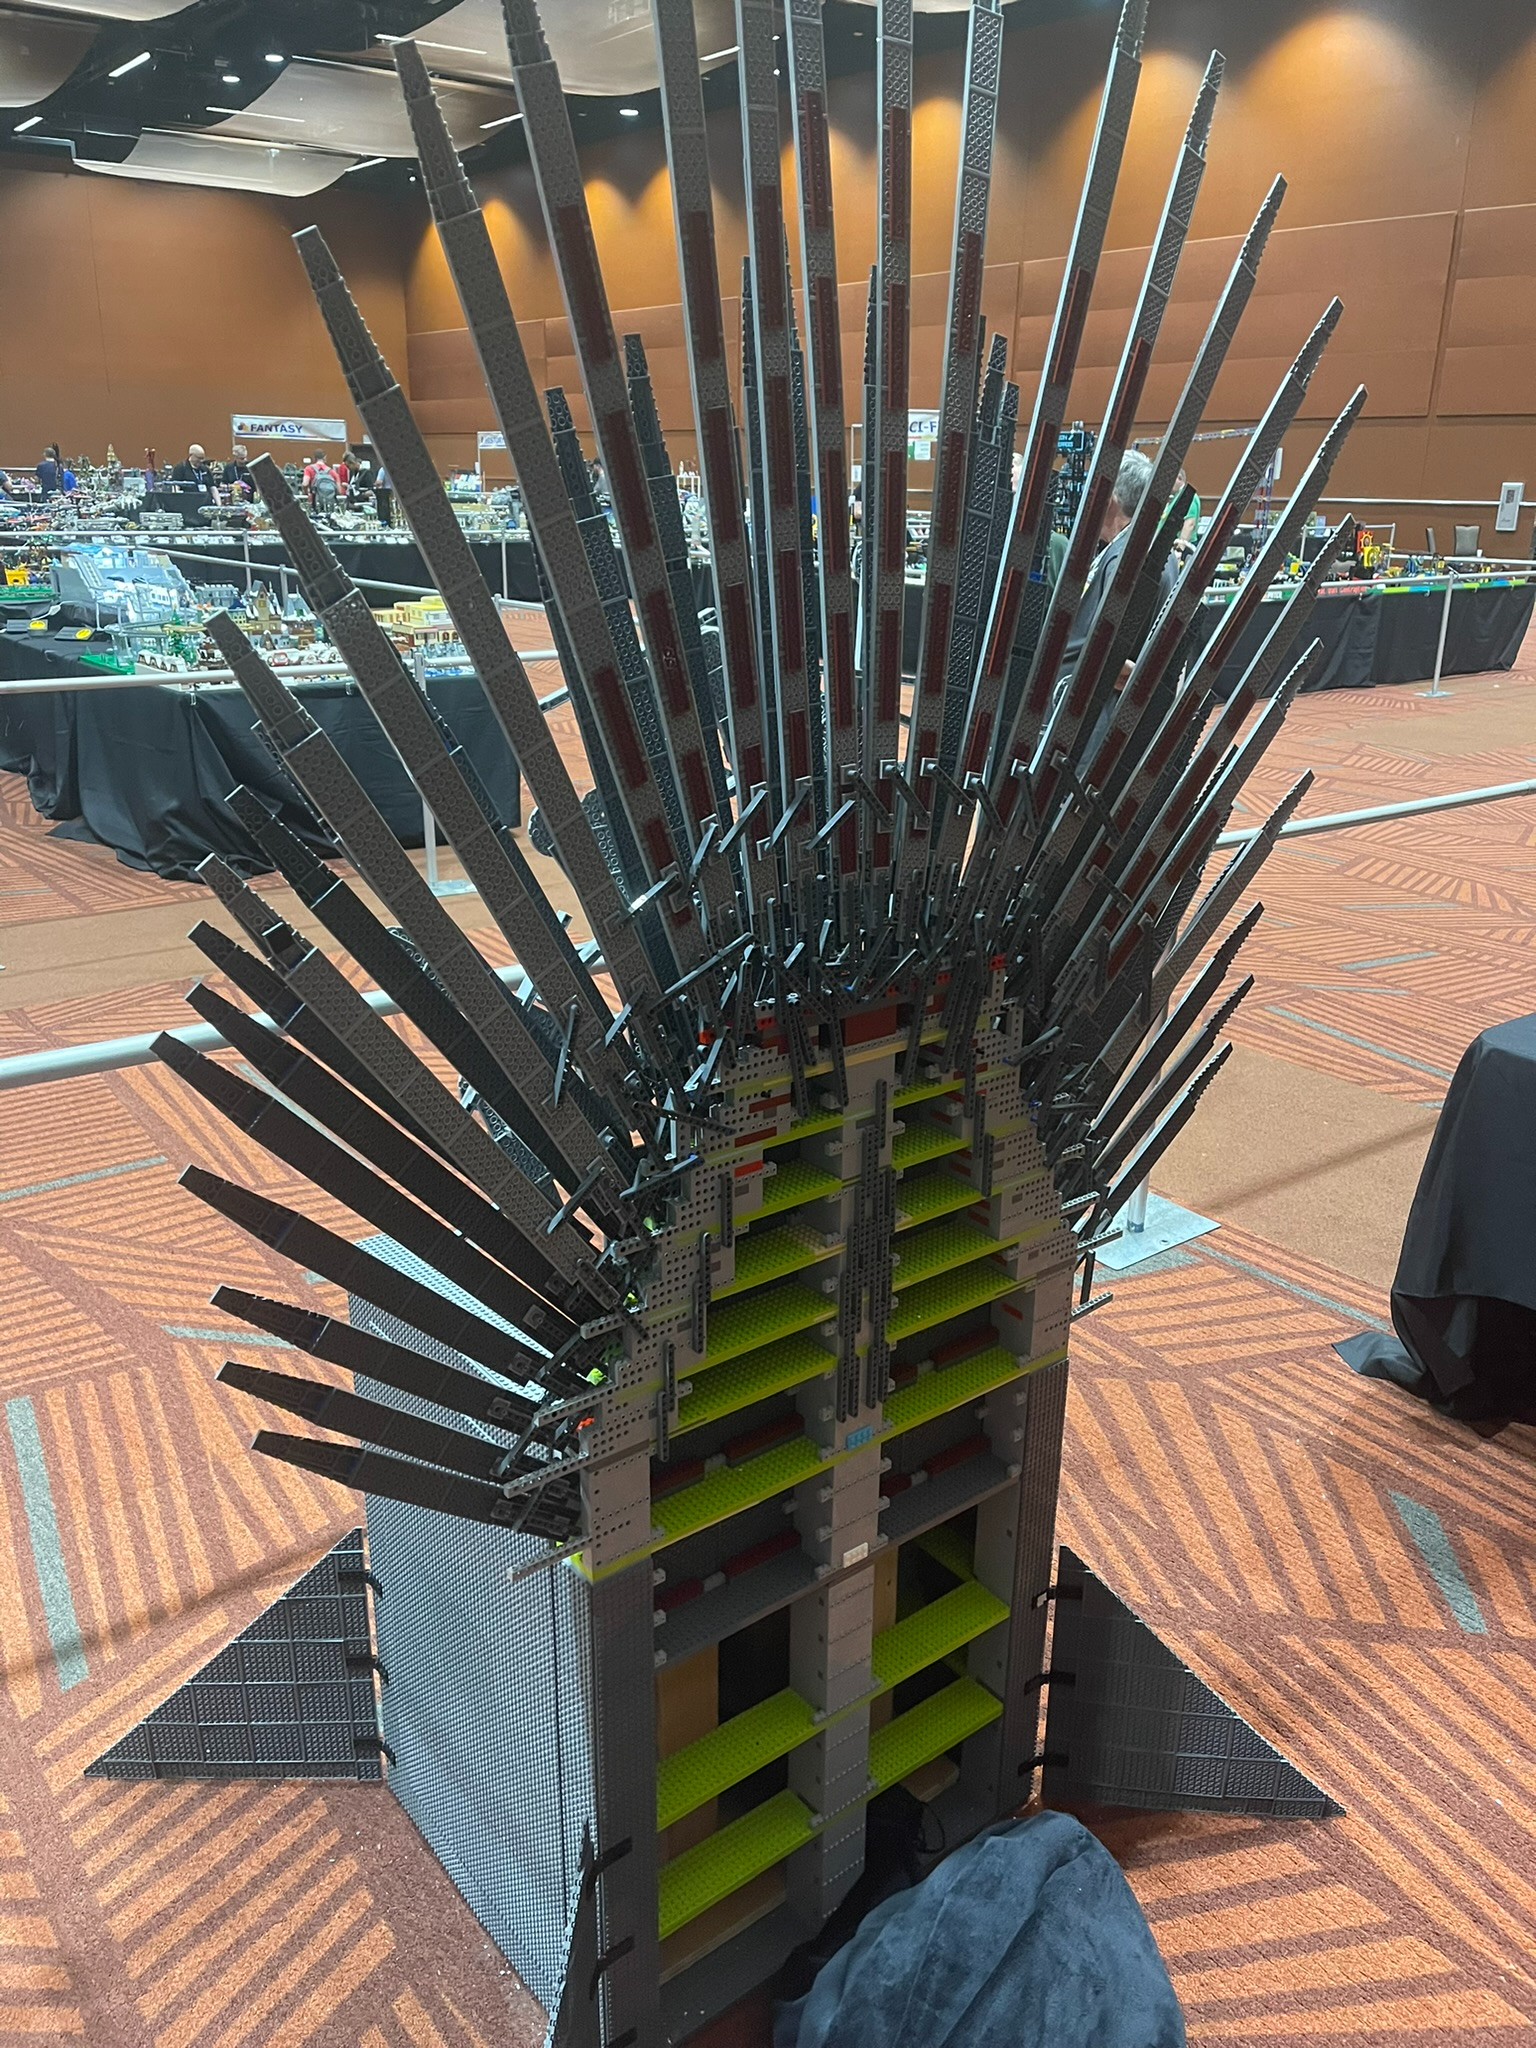
I first exhibited the Lego Throne at BrickCon 2024. You can find it in the virtual tour at the far back of the room beyond GBS & town & country.
BrickCon 2025
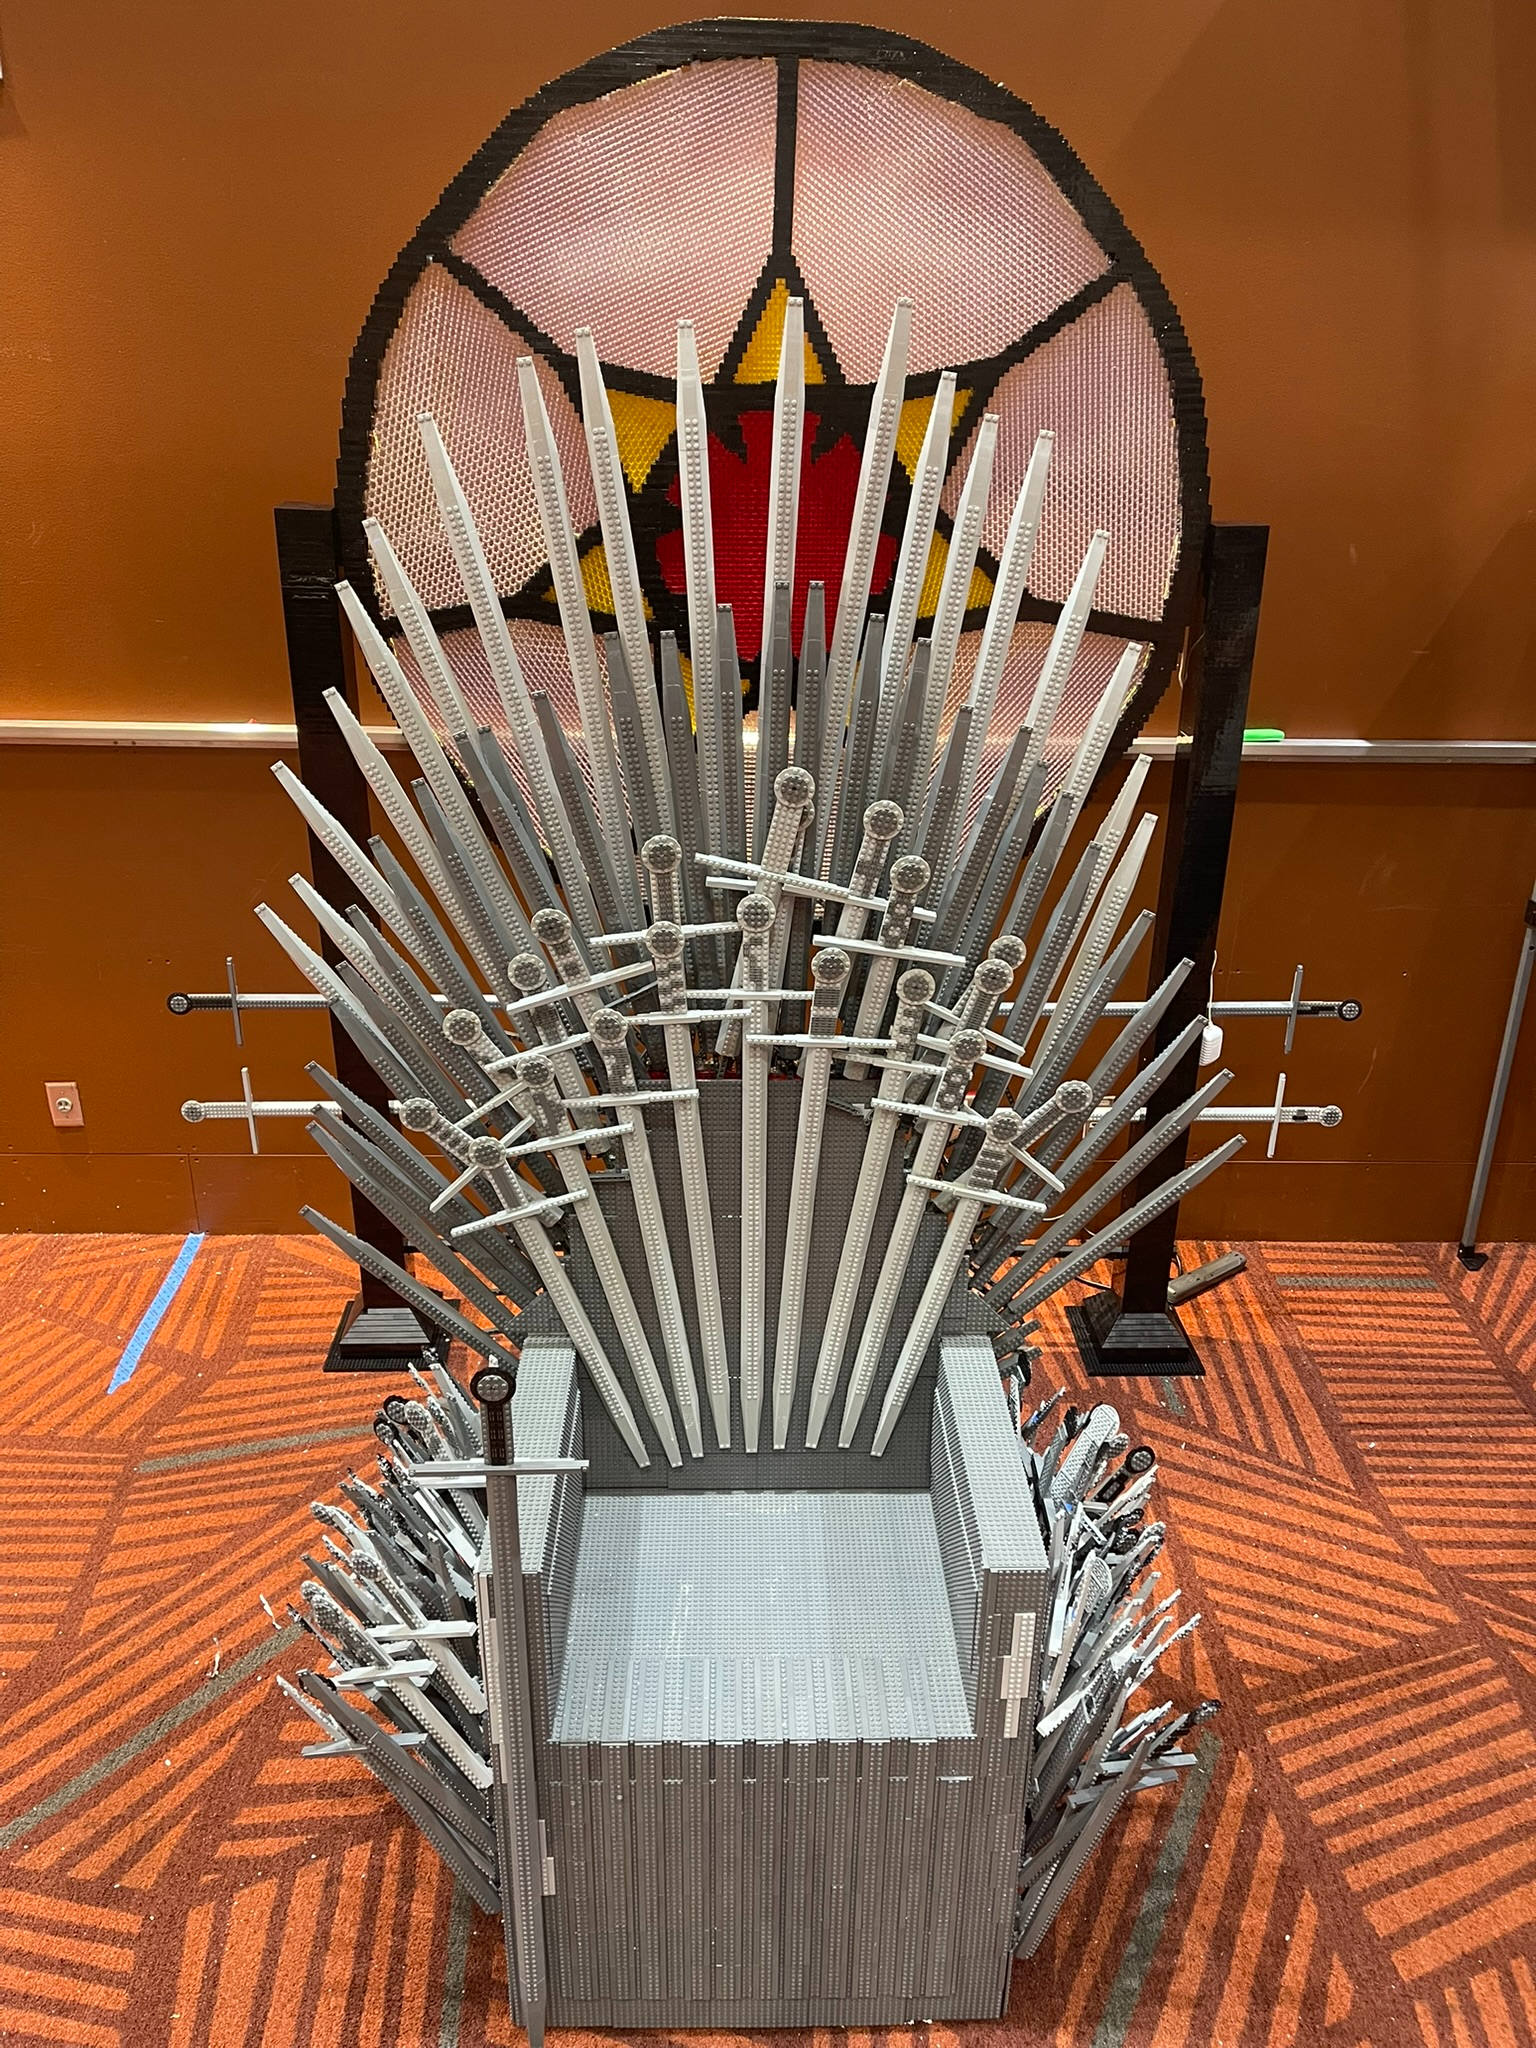
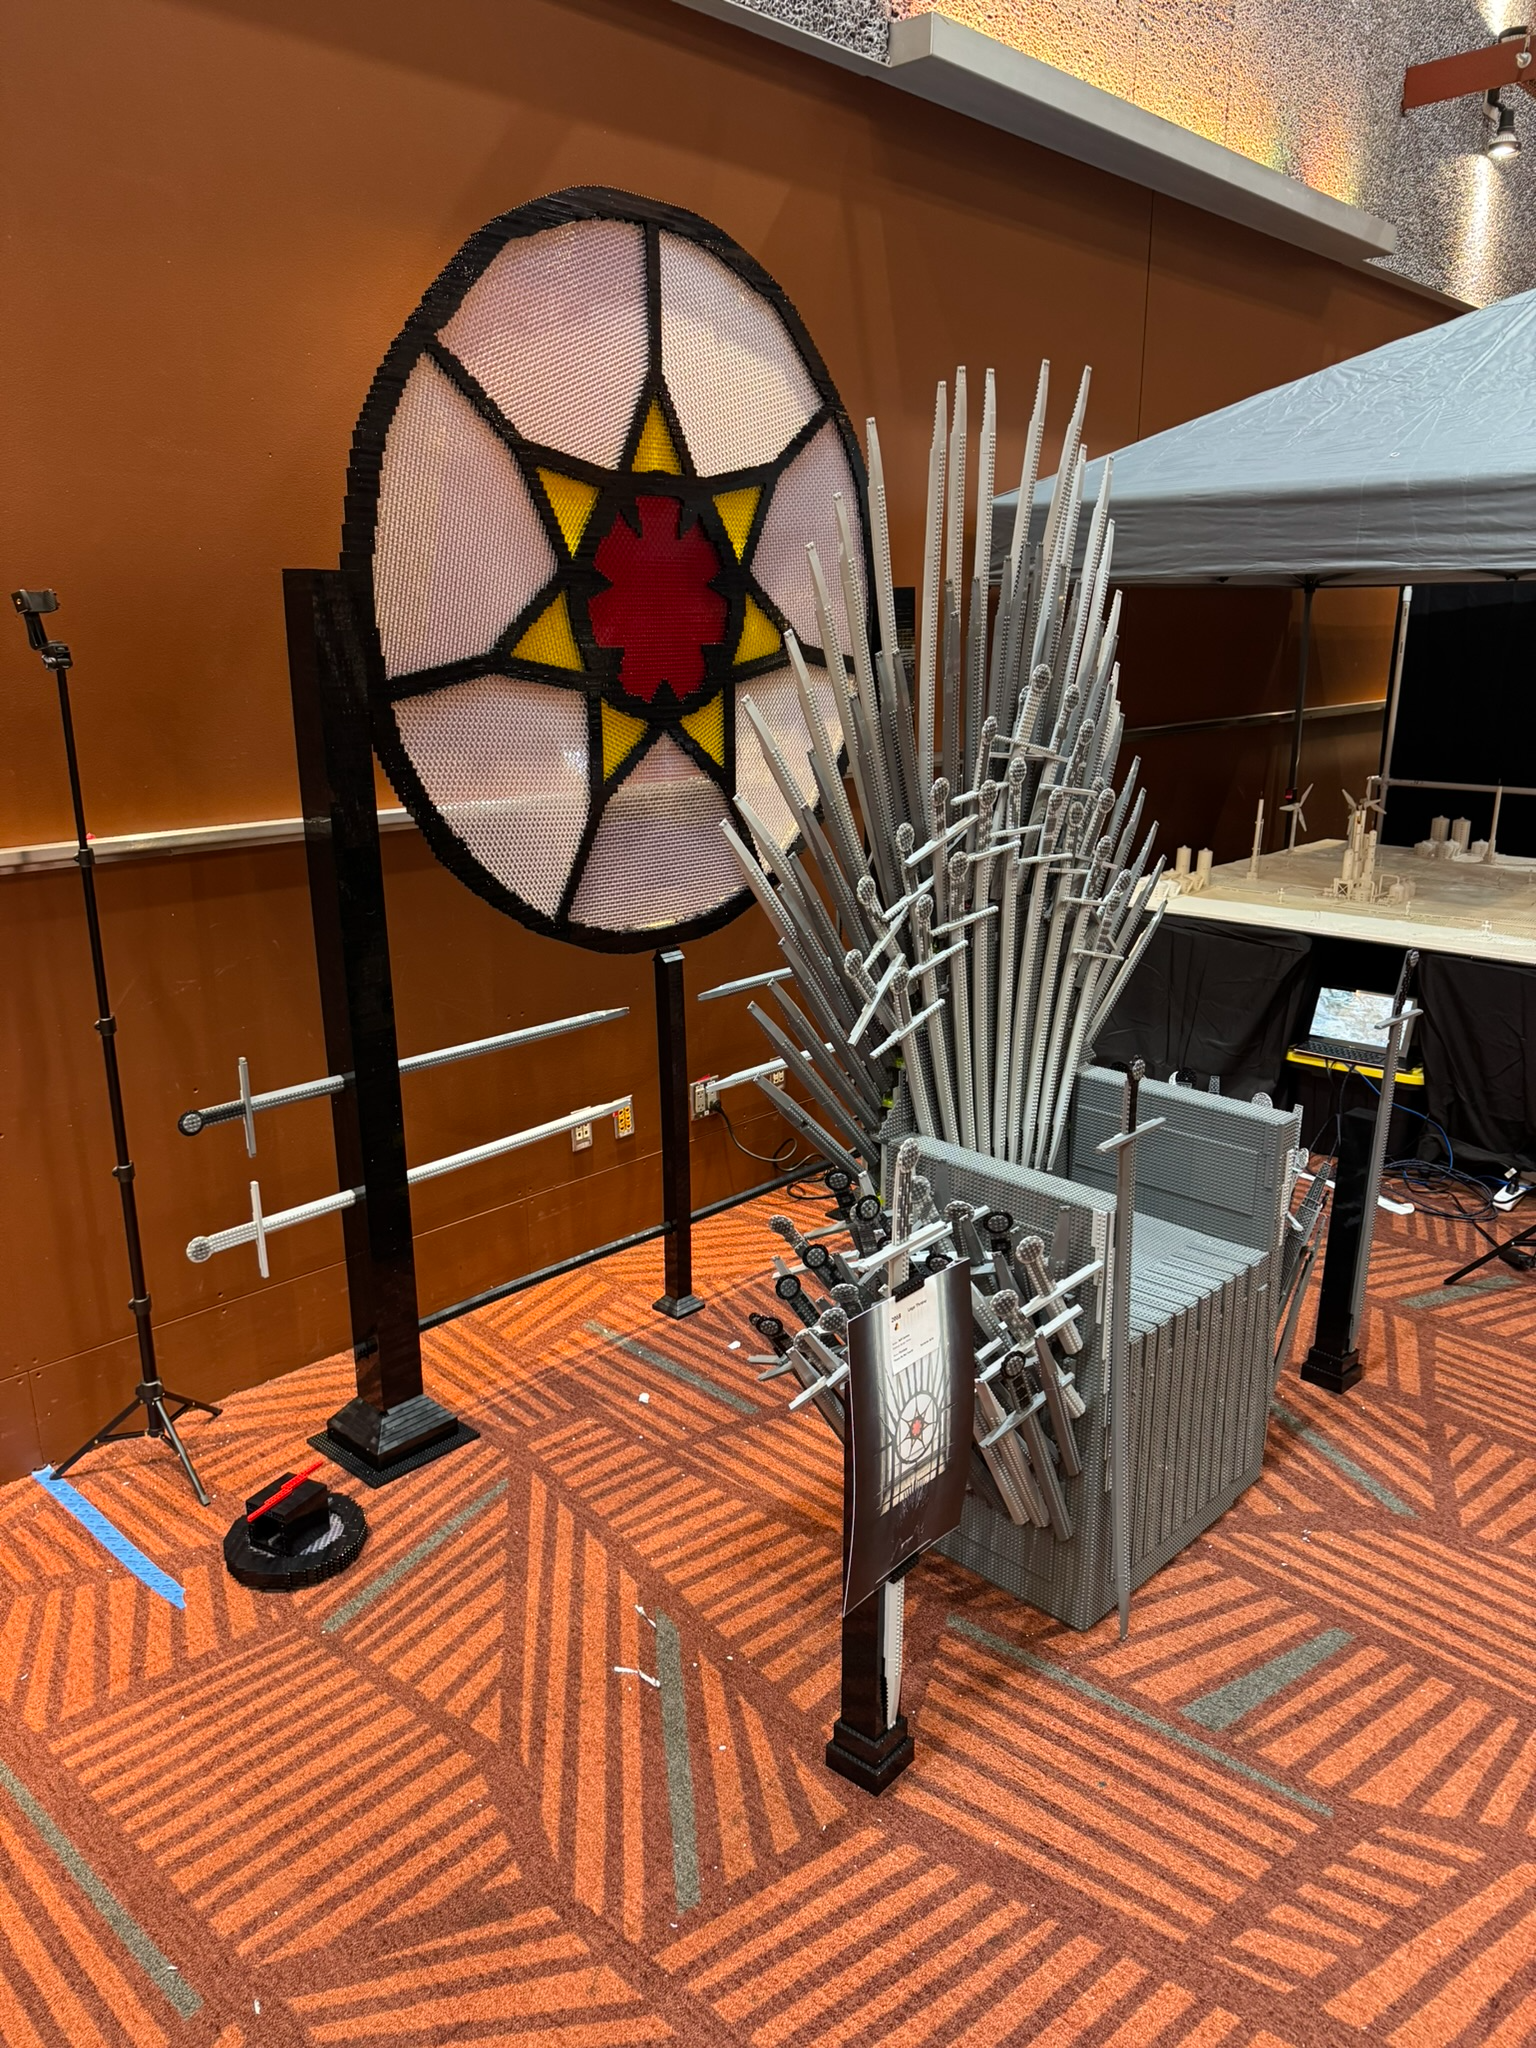
I brought throne v2 to BrickCon 2025 with the minor addition of side blades. The biggest change for this event was the addition of the Faith of the Seven stained glass window behind the throne. You can find it in the virtual tour at the far back of the room.
Version 3
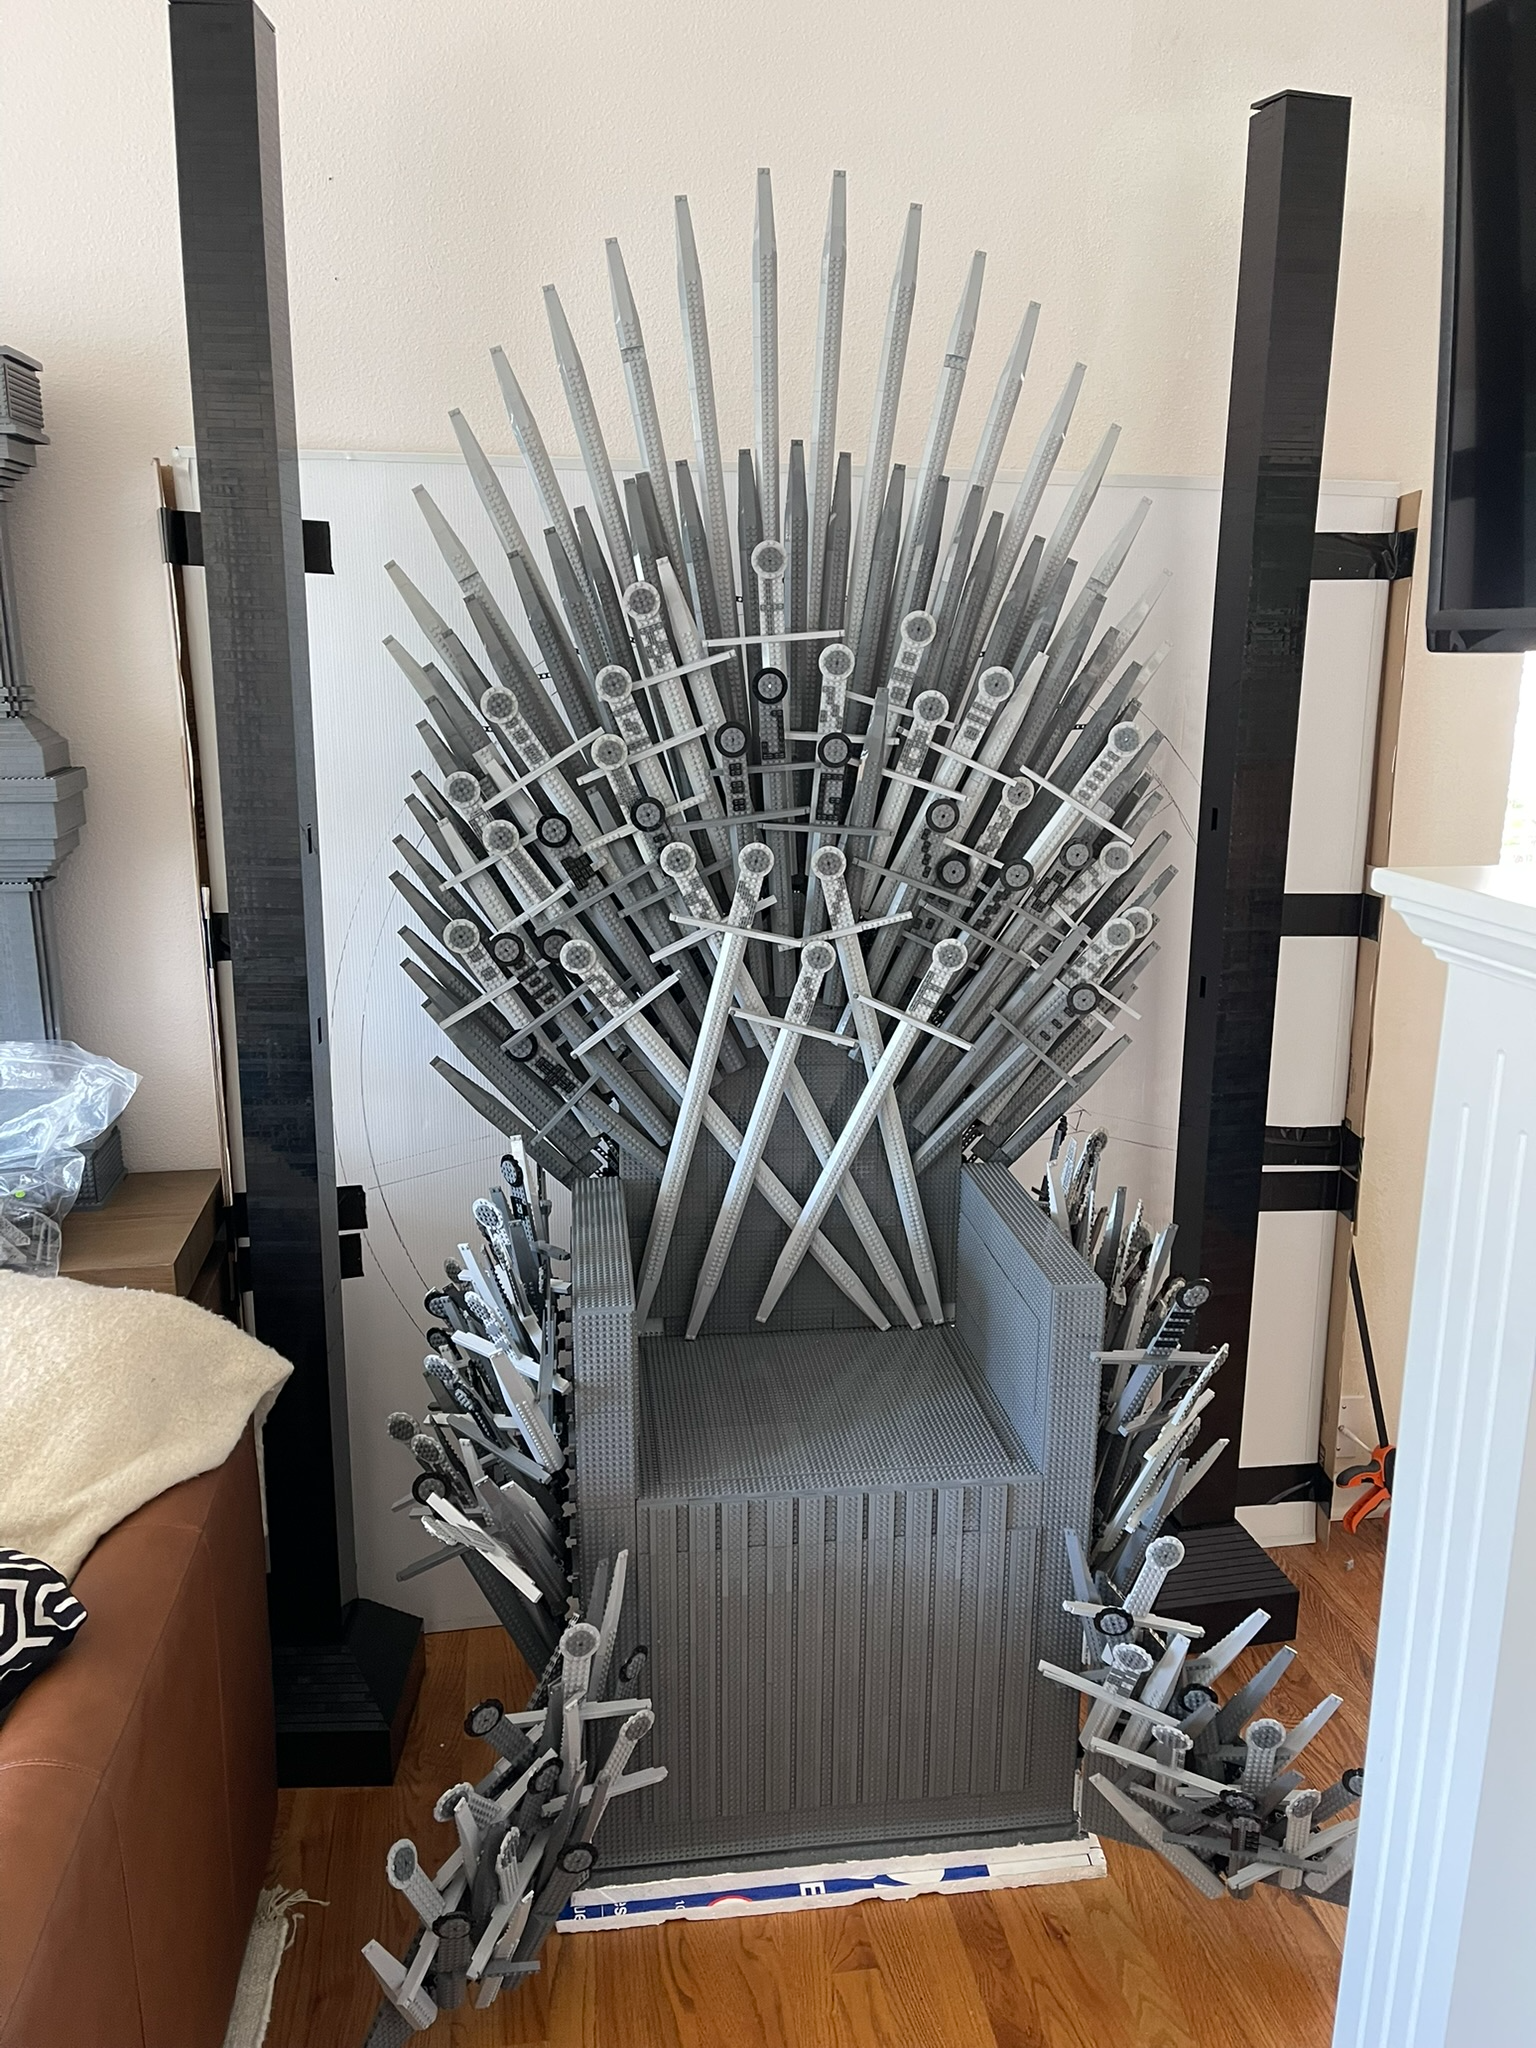
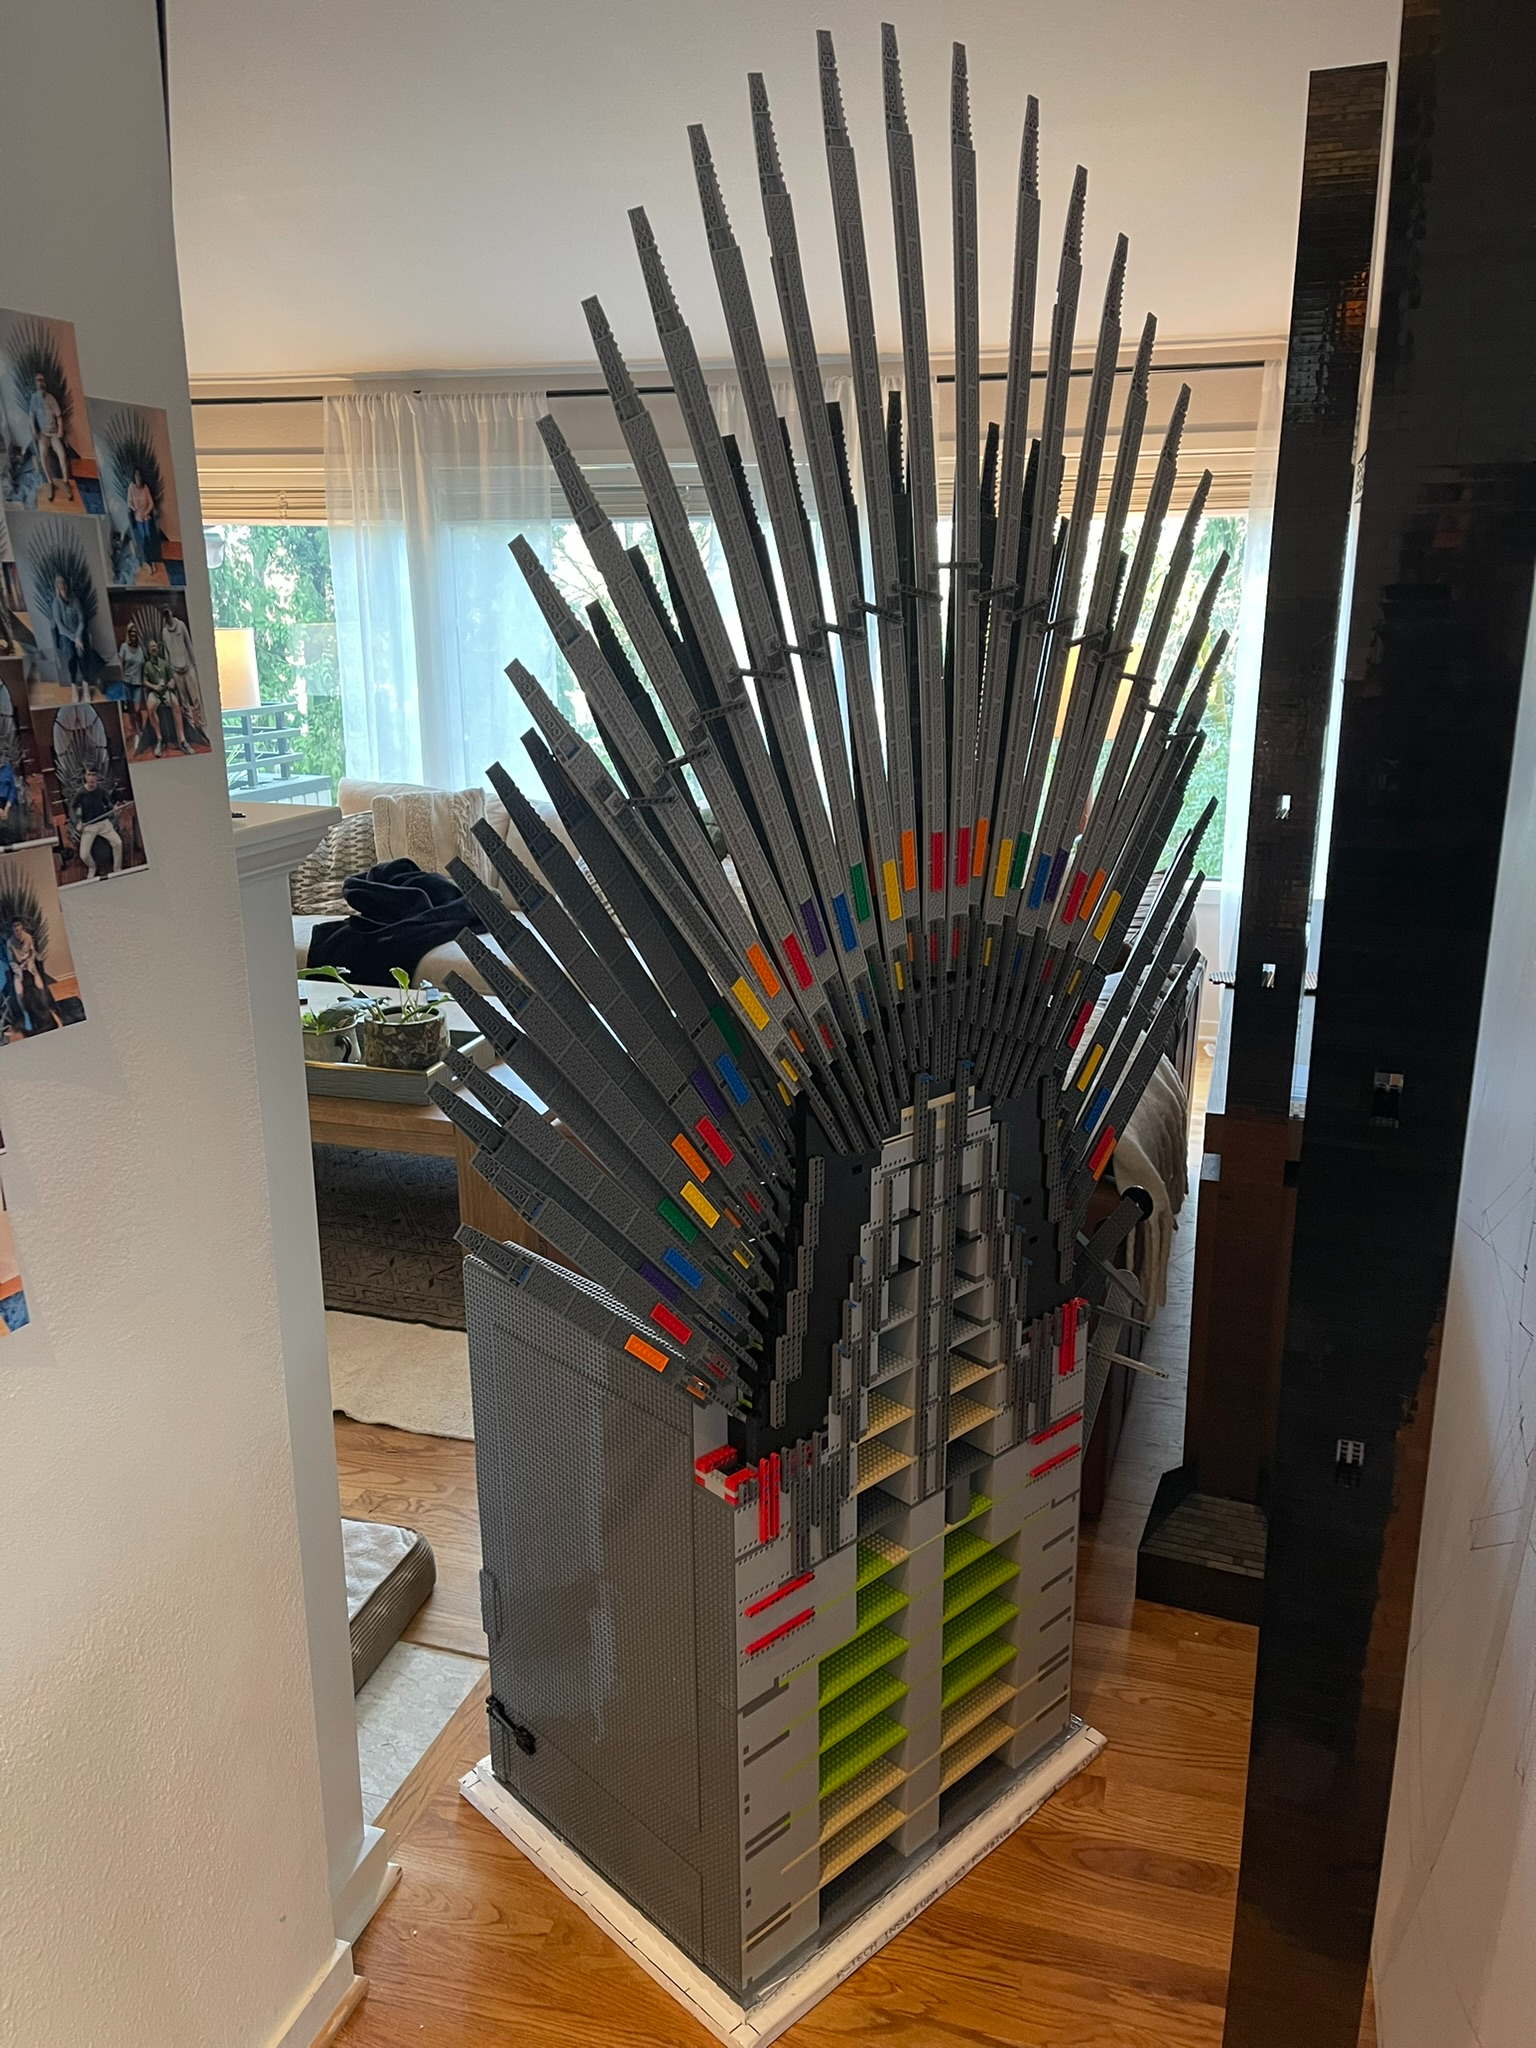
Between Deccember 2025 and March 2026, I performed a complete v3 rebuild of the Lego Throne with the primary goal of improving its portability.
- Modular seat - I redesigned the seat to allow the sides and back to be removed with most blades intact to save on assembly time.
- Cube techniques - I rebuilt the seat and back using perfect 8x8x8 cubes bridged by 8 wide plates, which allowed rapid iteration on the modular design.
- Wall angles - To increase portability, strength and consistency of the blade fans, I calculated pythagorean triples to remounting the rear two blade fans on fixed angles between technic bricks layered into a wall.
- Buttress blades - To increase authenticity, I added back the triangle buttresses to the front corners and covered them with random blades.
Design
Seat Construction
The version 3 throne was rebuilt to be modular to improve portability. The seat of the throne consists of ten 8x8 pillars bridged by 8 wide plates, one on each corner, one between the corners, and two in the center. Most of the seat pillars are bound to partial adjacent pillars to allow for modular connection by the back and sides.
The sides of the throne consist of three pillars capped on most sides by plates on SNOT bricks. The outer pillars step in to allow the exposed pillar base to lock into a cap atop the seat base. The rear pillar steps in at the top to allow the seatback to lock into the arm.
The back of the throne consists of three pillars, with the outer two tapering inward with each layer. This 8 deep wall is wrapped at the rear by a 2-deep U-shaped wall angle plate to hold the rear two blade fans (see below).
See video at LEGO Cube Techniques
Blade Mounts
The back two blade layers are all tip-up blades with pre-fixed mount angles for a uniform look. The rear fan is made of 18 blades built from 7-14 2x8 plates bridged by a pair of 2x8 Slope 45 in Light Bluish Gray. The next layer consists of 41 blades built from 2-6 such layers in Dark Bluish Gray. Both are mounted using calculated wall angles of pin holes placed in a brick wall according to approximate pythagorean triples to achive the desired angle. The rear layer uses peer binding to tune angles and prevent backward drift.
The next two blade layers are mostly hilt-up blades, currently with ad-hoc mounting for a scattered look. They are pinned to technic beams atop the front of the seat back and use peer binding to fix their angles. The rear layer of 17 hilts and 4 tips is in Light Bluish Gray and the forward layer of 13 hilts and 3 tips is in Dark Bluish Gray.
The frontmost layer of blades on the seatback consists of 3 full blades, tip to hilt, mounted using ‘floor angle’ pythagorean calcuations. Another 3 full blades are layerd over them using spacers that allow for arbitrary angle mounting.
The side and buttress blades are a mix of short 1-4 layer tip-up and hilt-up blades in Light and Dark Bluish Gray. All are mounted using a ball joint to allow arbitrary angles.
See video at LEGO Blade Techniques.